Limitations
While free hosting for blogs has its perks, there are some limitations to keep in mind.
Limited Features: Free hosting often comes with restrictions. You might face limits on storage, bandwidth, or even customization. These can hold you back as your blog grows.
Ads and Branding: Most free hosting services include ads or platform branding. This means your readers may see ads that you have no control over. It can also make your blog look less professional.
SEO and Monetization Challenges: Free hosting can limit your SEO potential. It’s harder to rank high on search engines when you don’t have a custom domain or full control over your site’s settings. Monetization can be tough, too. Many free hosts restrict your ability to make money from ads or affiliate links.
Migration Issues: If you decide to move to paid hosting later, transferring your blog can be challenging. You might lose some data or face downtime, which can be frustrating.
When Should You Consider Free Hosting?
Free hosting can be a smart choice in some situations.
Starting Out: If you’re a beginner just testing the waters, ‘free hosting for blog’ is a great start. It allows you to learn without spending money.
Personal or Hobby Blogs: If your blog is just for fun or personal use, free hosting is ideal. There’s no need to pay for hosting when you’re not trying to make money.
Temporary Projects: Free hosting works well for short-term or experimental projects. You can create a site for a special event, a school project, or anything temporary without a long-term commitment.
Learning and Experimentation: It’s perfect for learning the basics of blogging and web management. You can experiment, make mistakes, and learn without worrying about costs.
How to Get Started with Free Hosting
Getting started with free hosting for blog is easy and straightforward. Follow this simple guide to launch your blog today:
Step-by-Step Guide:
- Choose a Platform: Pick a free hosting provider like WordPress.com, Blogger, or Wix. Consider the features and limitations each offers.
- Sign Up: Create an account on the chosen platform. This usually takes just a few minutes.
- Select a Template: Choose a template that fits your blog’s style. Most platforms offer plenty of free themes to pick from.
- Customize Your Blog: Adjust colors, fonts, and layouts to make your blog unique. Don’t be afraid to get creative!
- Create Content: Start writing and publishing your posts. Focus on quality content that adds value to your readers.
- Promote Your Blog: Share your posts on social media, engage with your audience, and build a community.
Tips for Success:
- Optimize Your Blog: Use SEO techniques to improve your visibility. Include keywords naturally in your posts.
- Stay Consistent: Publish regularly to keep your audience engaged.
- Engage with Readers: Respond to comments and build relationships.
Upgrading Options
As your blog grows, consider moving to a paid hosting plan. Paid plans offer more control, better SEO tools, and greater monetization opportunities. Upgrading can help you take your blog to the next level.
Setting up Free WordPress.org Hosting with a Dedicated C-panel
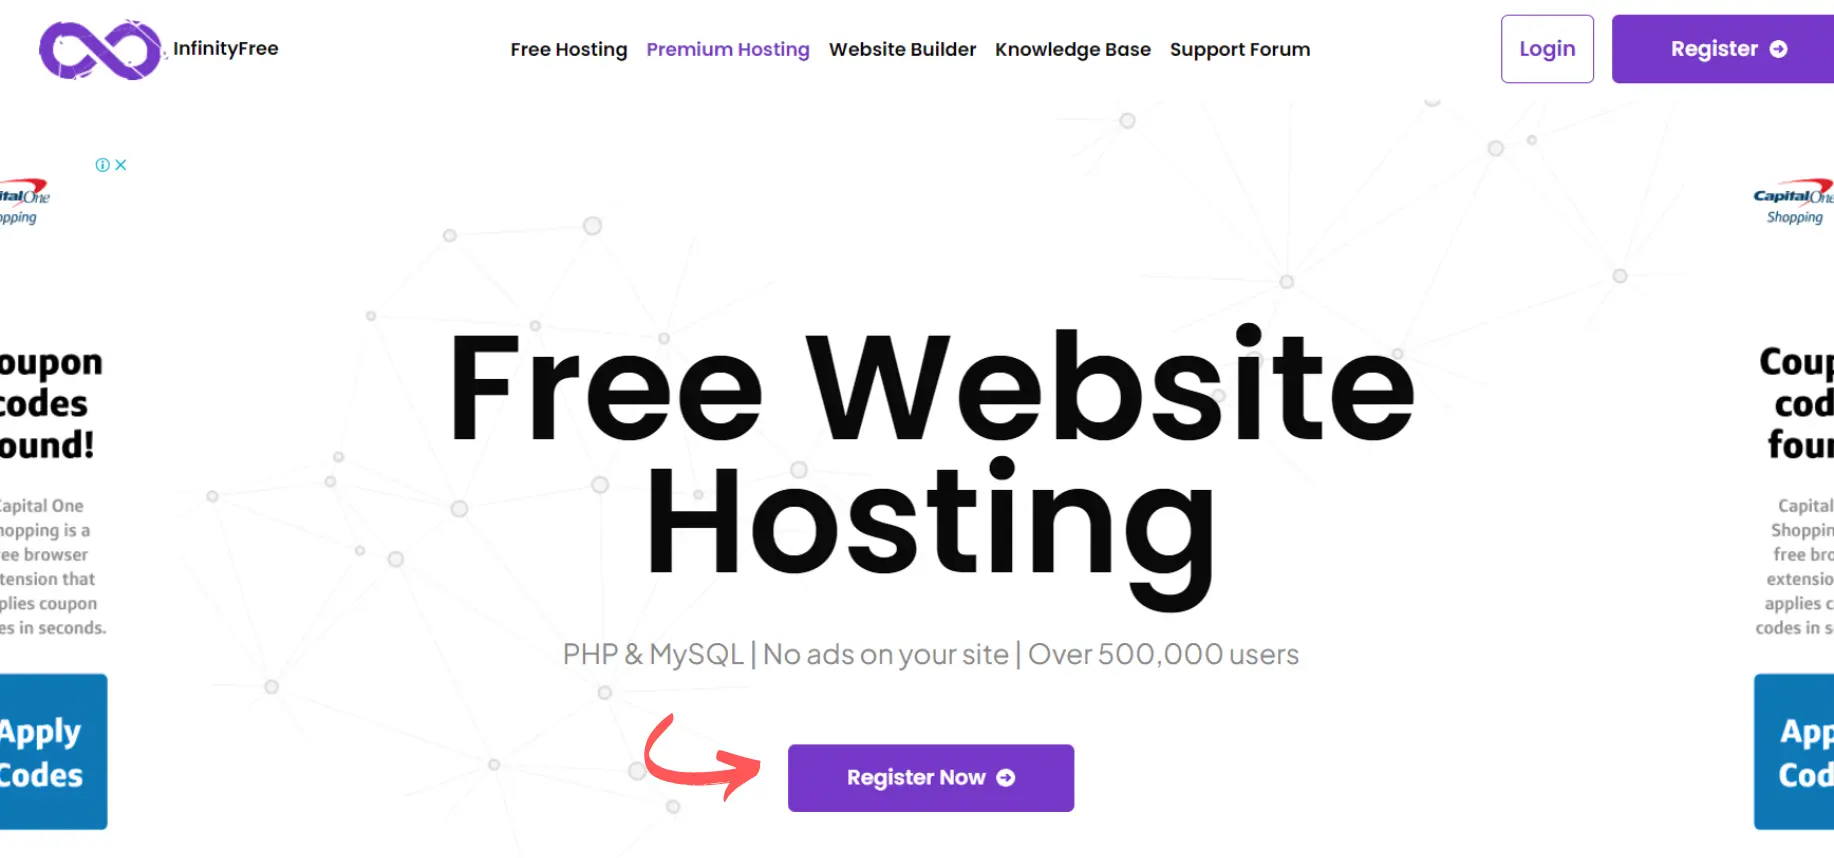
Step 1: Visit the InfinityFree Website
- Open your web browser and go to the InfinityFree homepage. On the homepage, you’ll see a button labeled “RegisterNow.” Click on it to begin the registration process.
2: Create Your Account
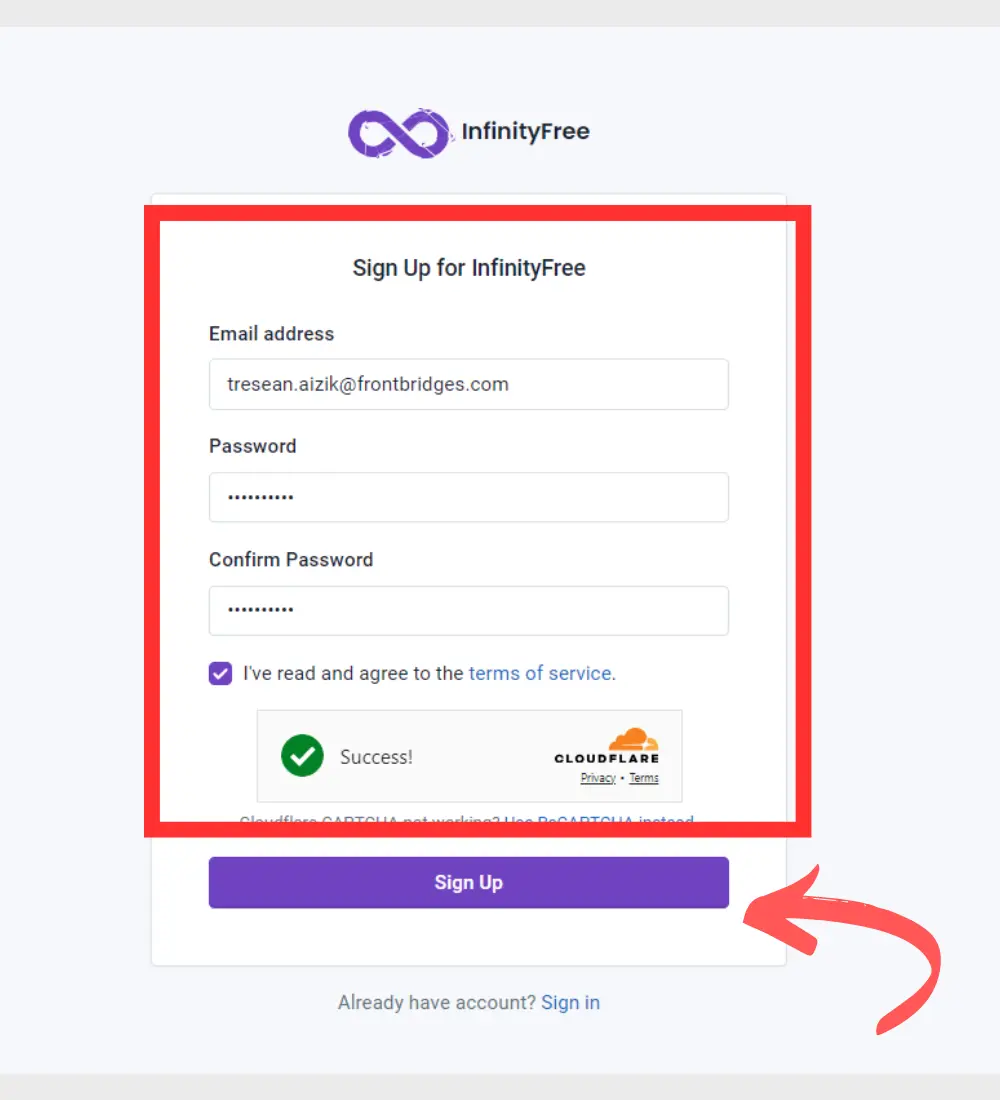
- Enter Your Email Address: In the sign-up form, enter your valid email address.
- Create a Password: Choose a strong password for your account. Make sure it’s something you can remember but also secure.
3: Verify Your Email Address
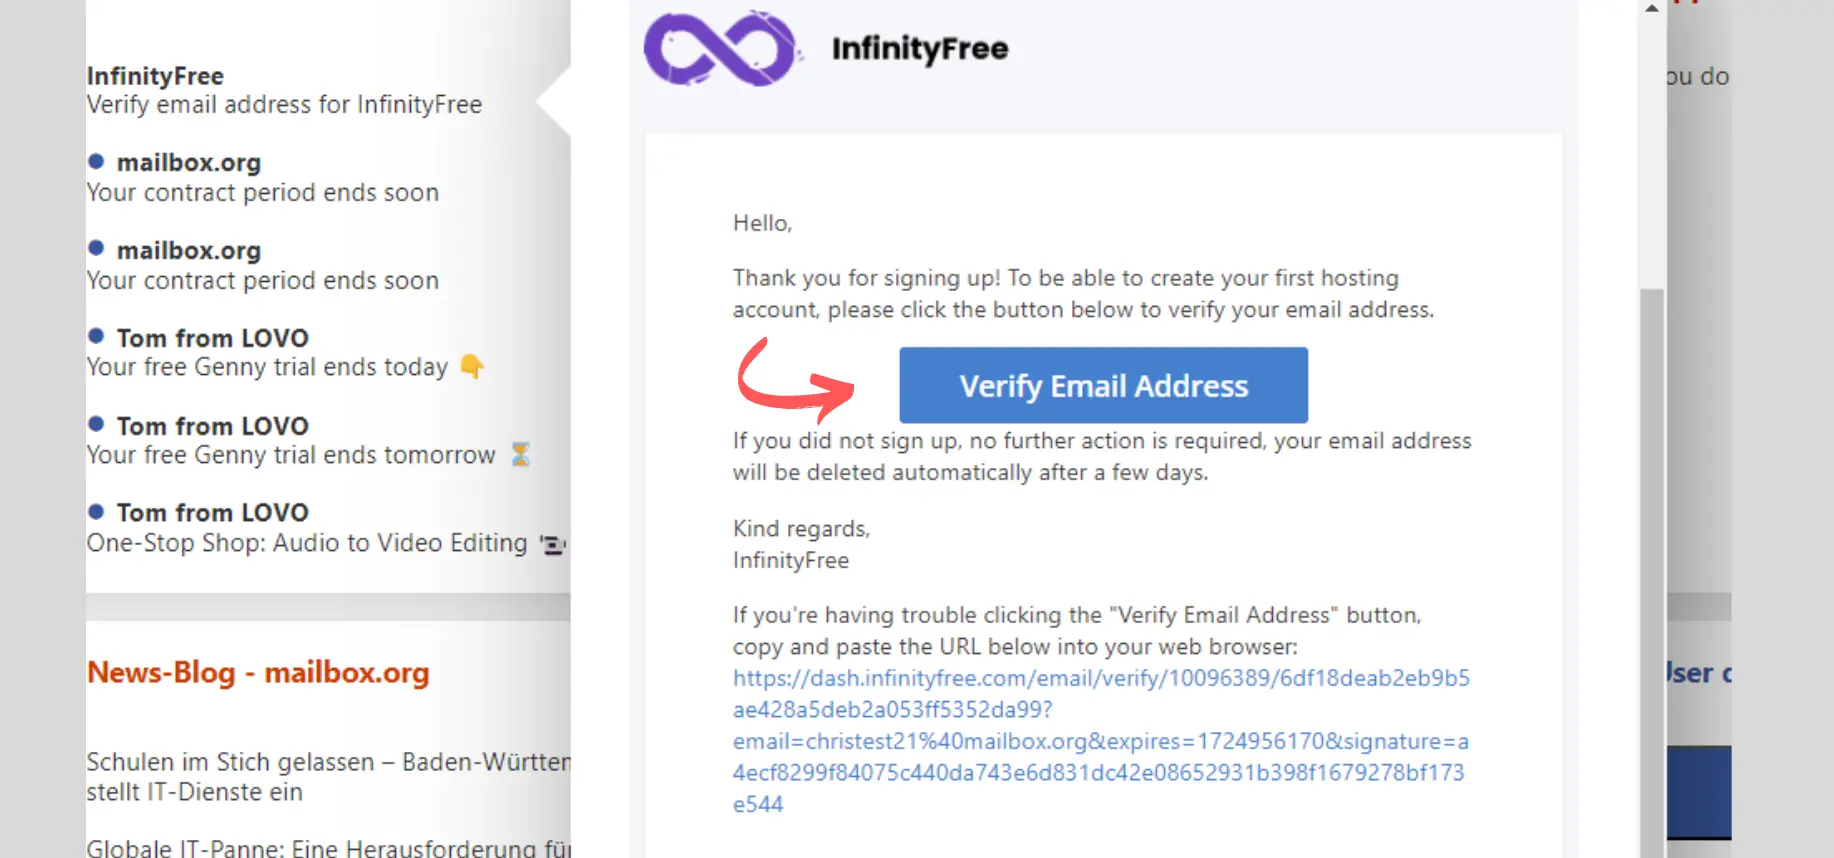
- Check Your Email: After creating your account, InfinityFree will send a verification email to the address you provided.
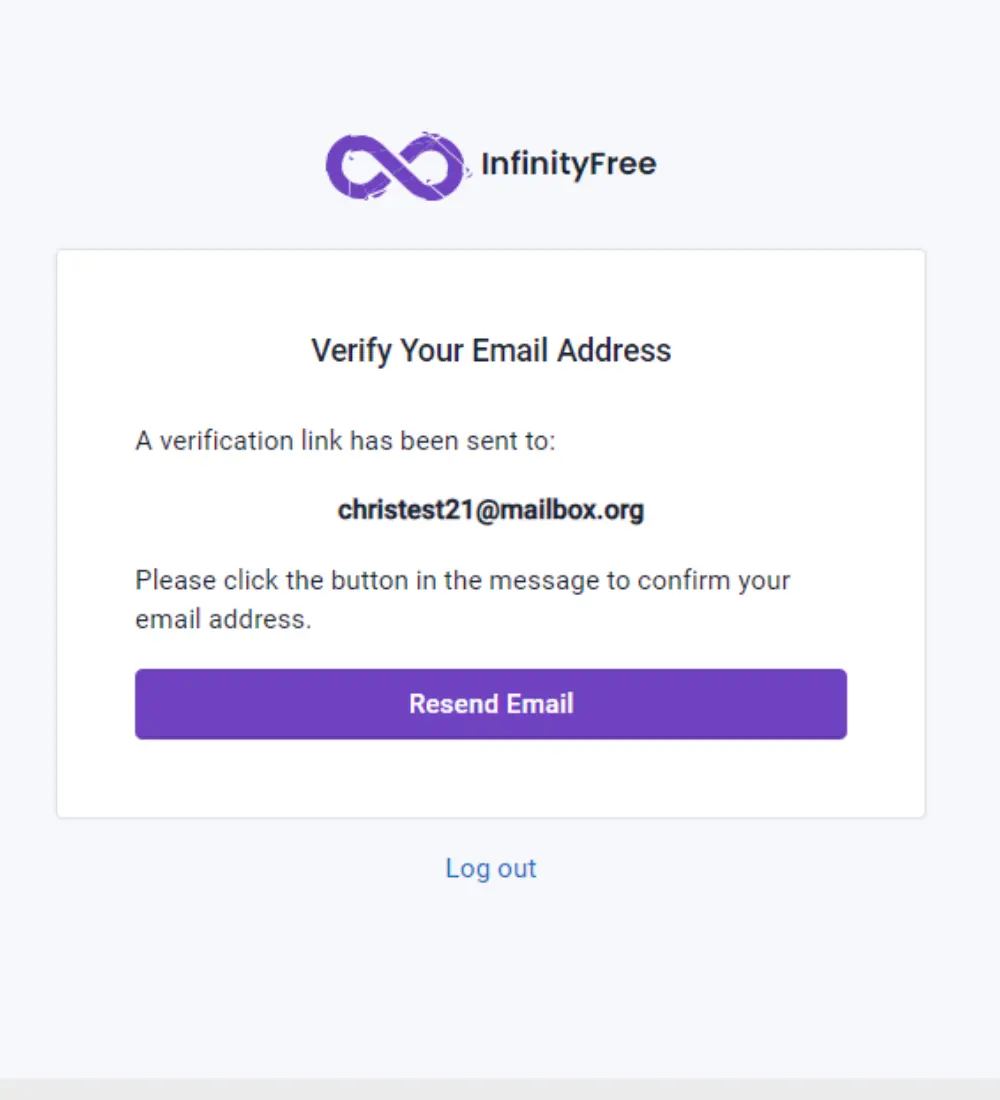
- Open the Verification Email: Find the email from InfinityFree in your inbox (check your spam folder if you don’t see it).
- Click the Verification Link: In the email, click on the verification link to confirm your email address and activate your account.
4: Log In to Your InfinityFree Account
- Return to the InfinityFree Website: After verifying your email, go back to the InfinityFree website.
- Click “Login”: Click the “Login” button on the homepage.
- Enter Your Credentials: Use your email and password to log into your newly created account.
- Go to the Client Area: After logging in, you’ll be directed to the InfinityFree client area.
- Click on “Create Account”: To start your hosting journey, click on the “Create Account” button.
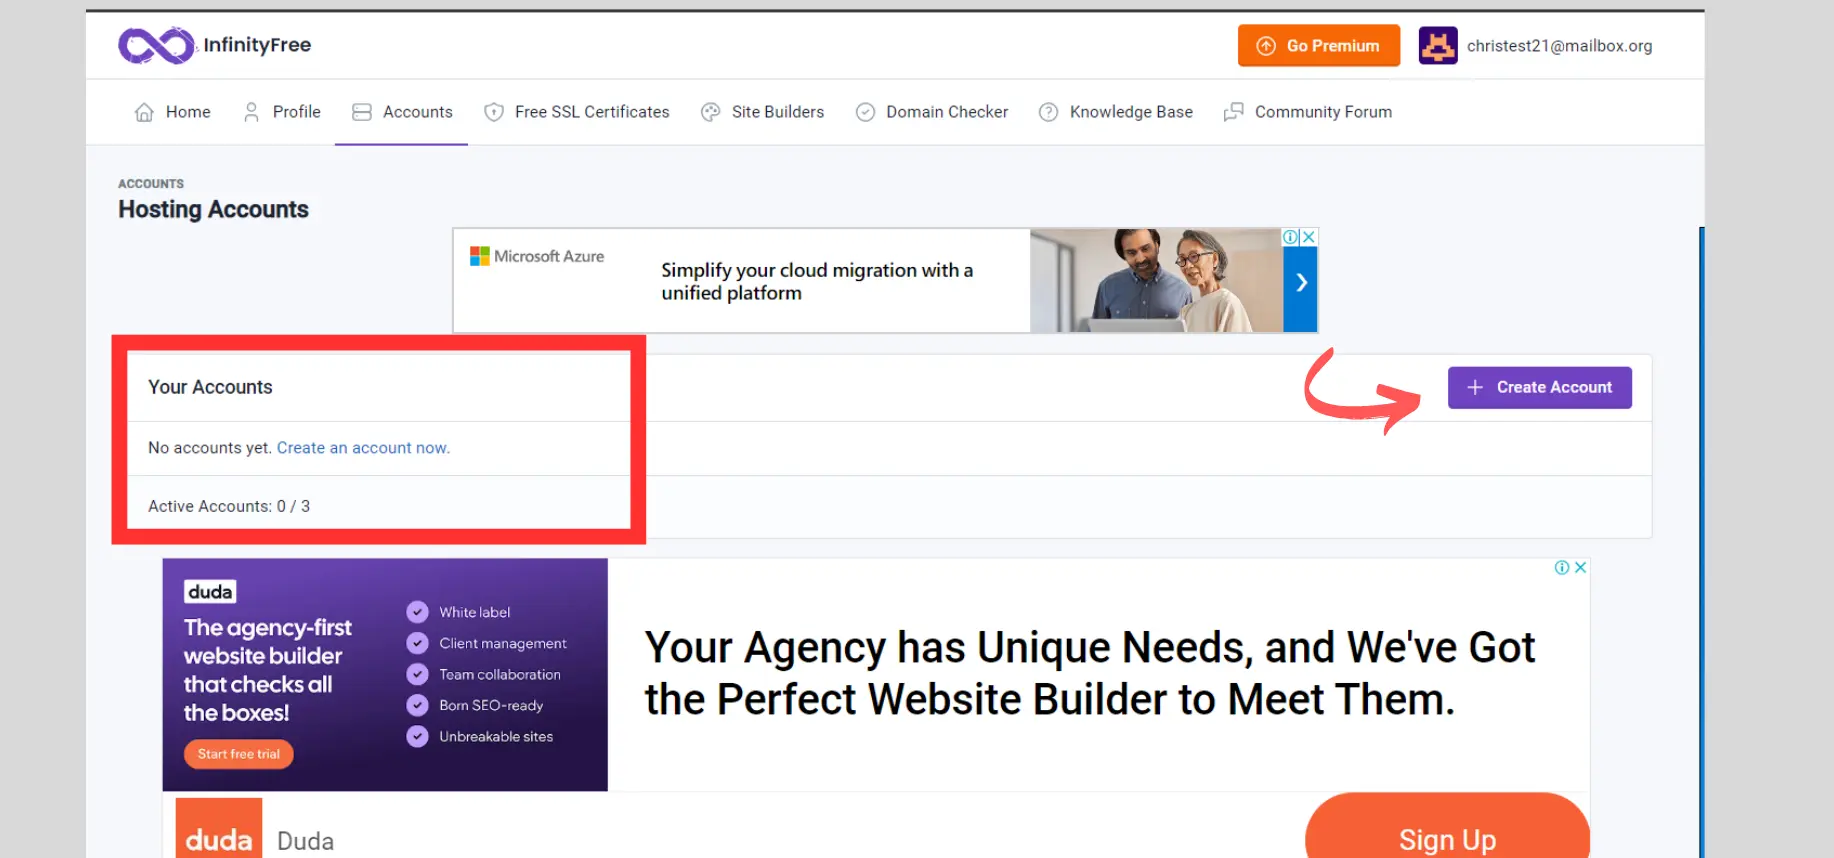
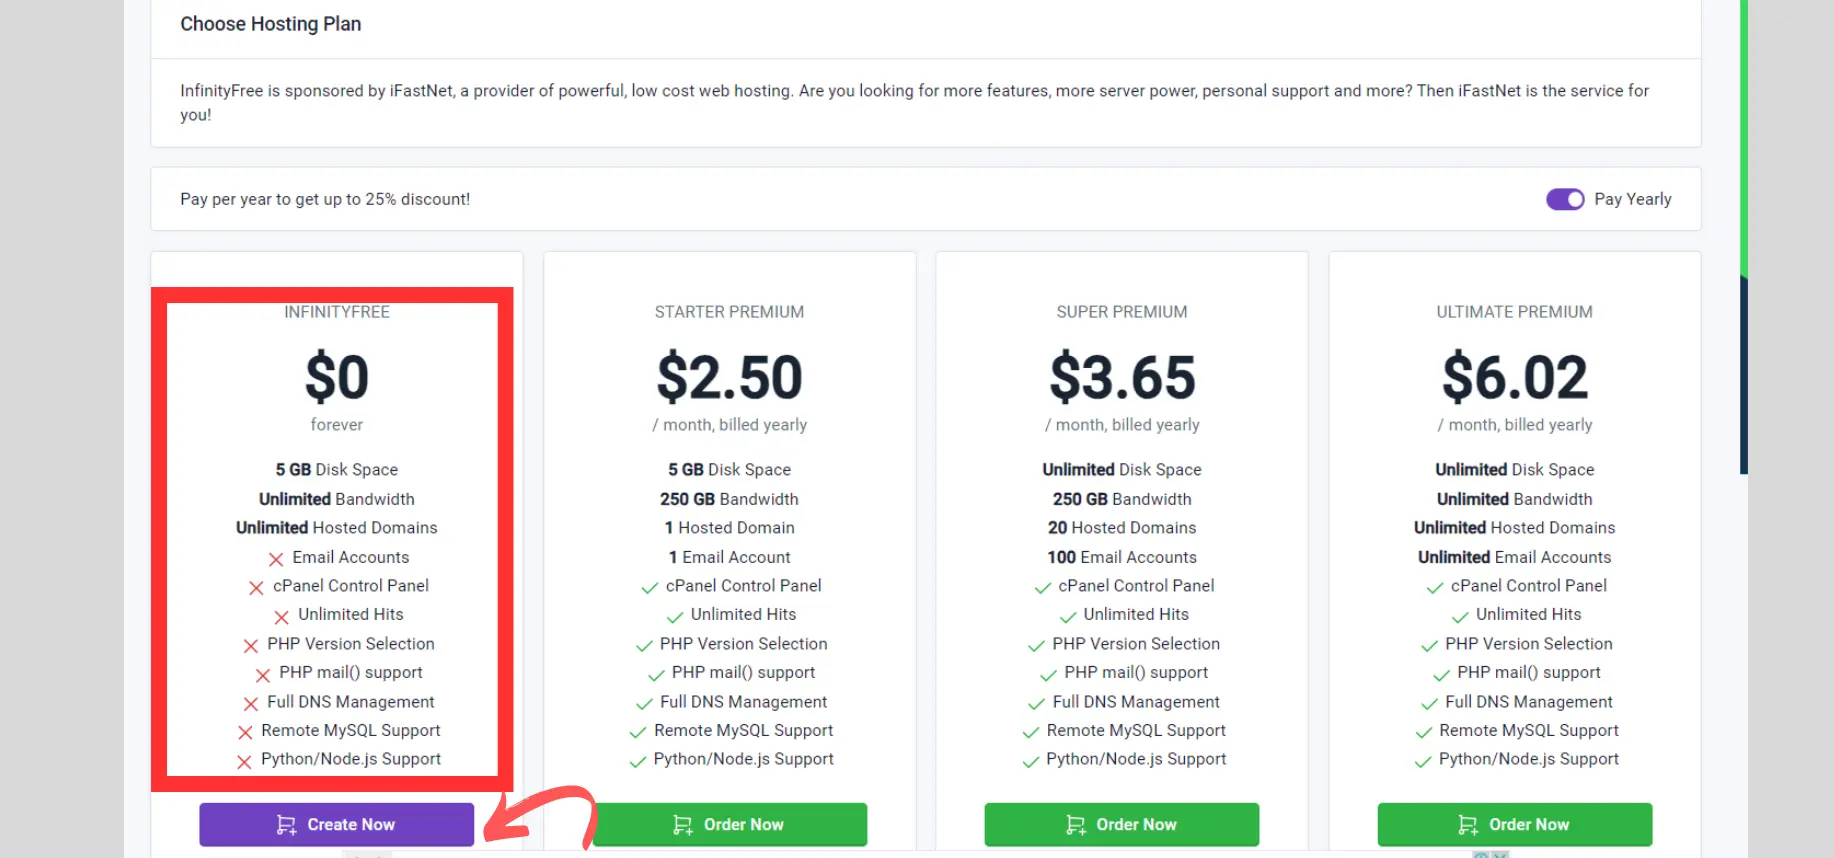
- Choose the Infinityfree Package: To ensure that we tap into the ‘free hosting for blog’ correctly, click on the “Create now” button under Infinityfree.
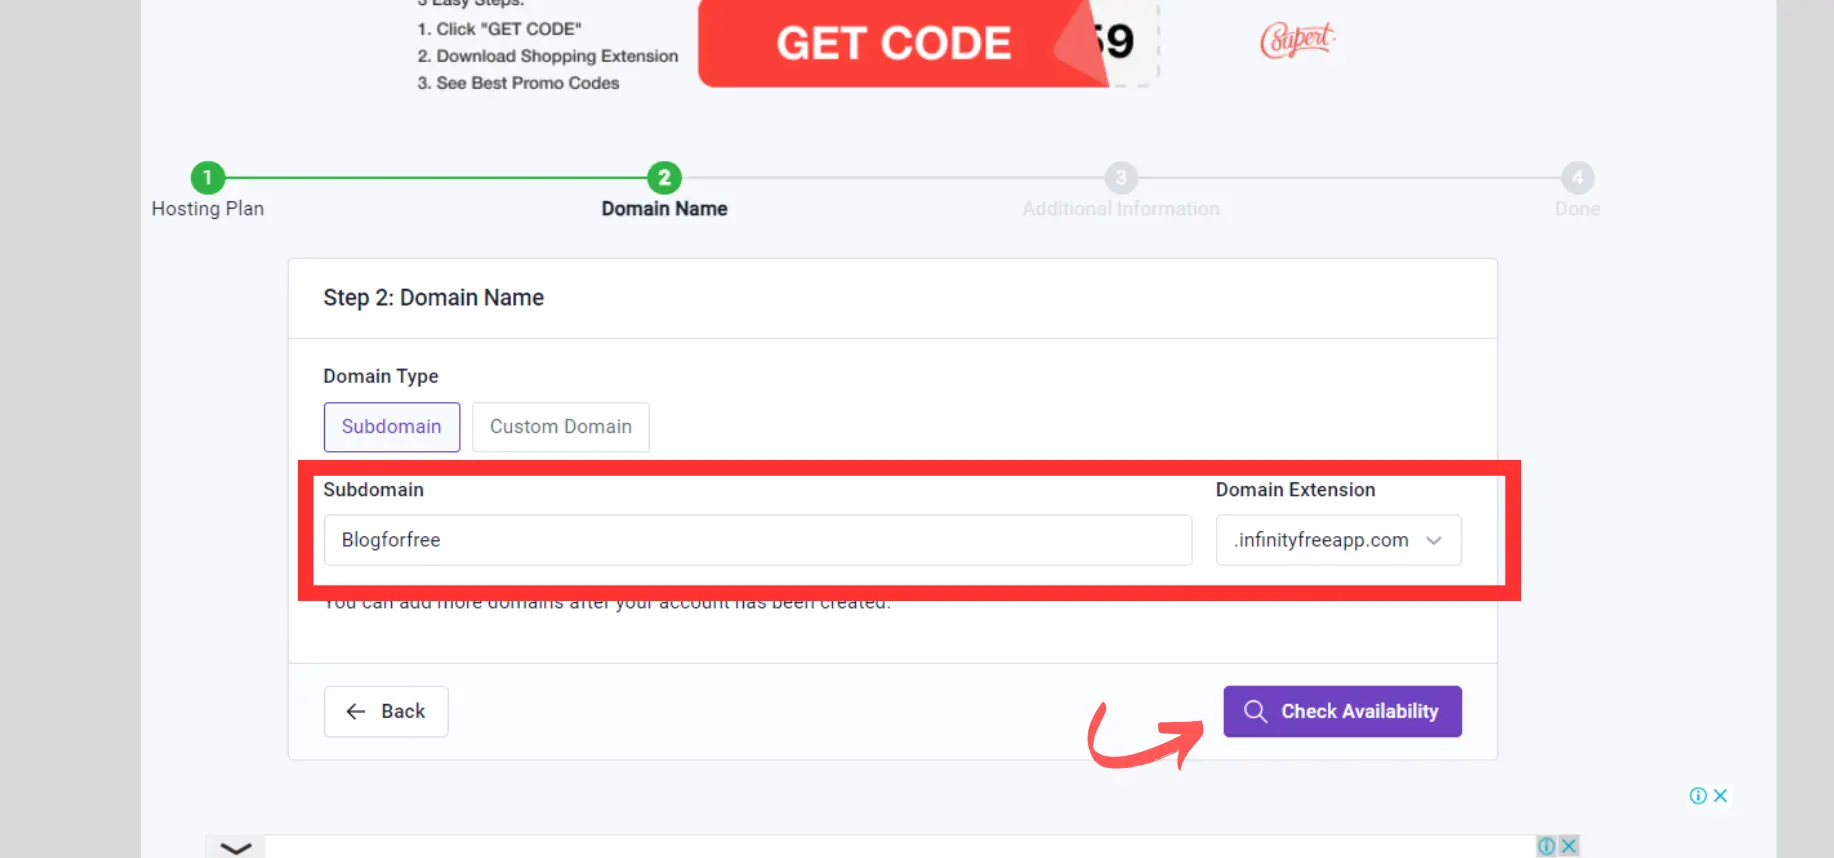
Choose a Subdomain: InfinityFree provides a free subdomain. Enter your desired subdomain name in the field provided, or you can use your custom domain if you have one.
- Set Up Account Details: Fill in any other required information for your hosting account, such as the site name.
- Review Your Information: Double-check all the details you’ve entered to ensure they are correct.
- Click “Create Account”: After reviewing, click the “Create Account” button to finalize your free hosting account setup.
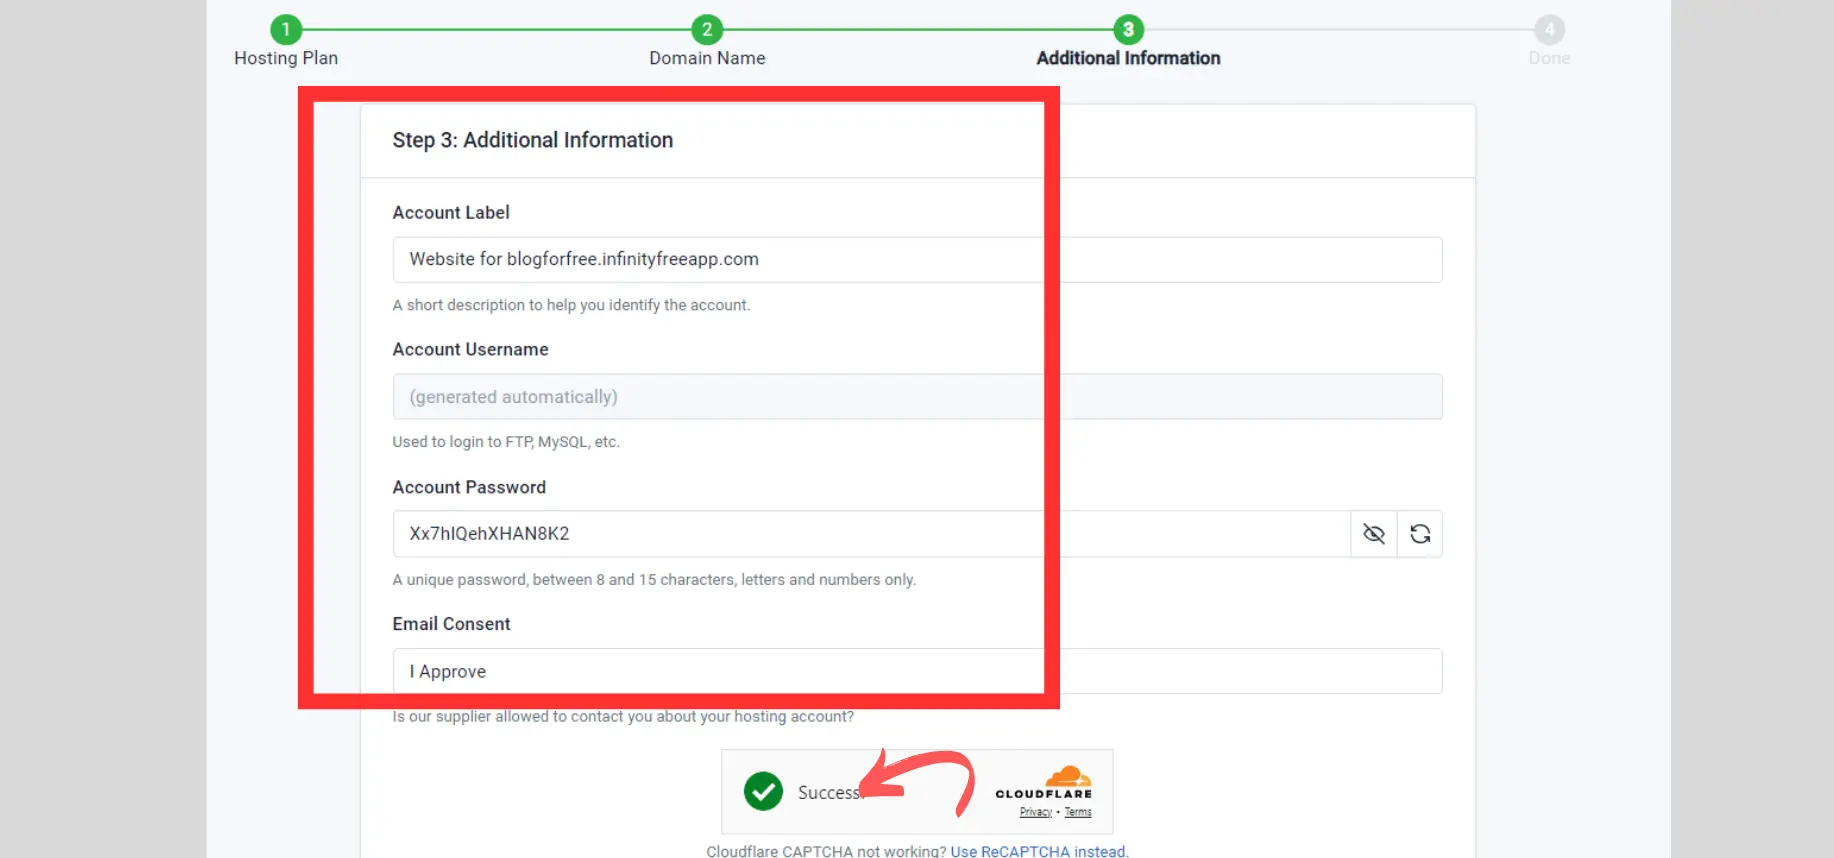
5: Access Your Control Panel
- Wait for Setup Completion: InfinityFree will take a few moments to set up your hosting account.
- Click on “Go to Control Panel”: Once your account is ready, you’ll be directed to a page where you can access the control panel (cPanel).
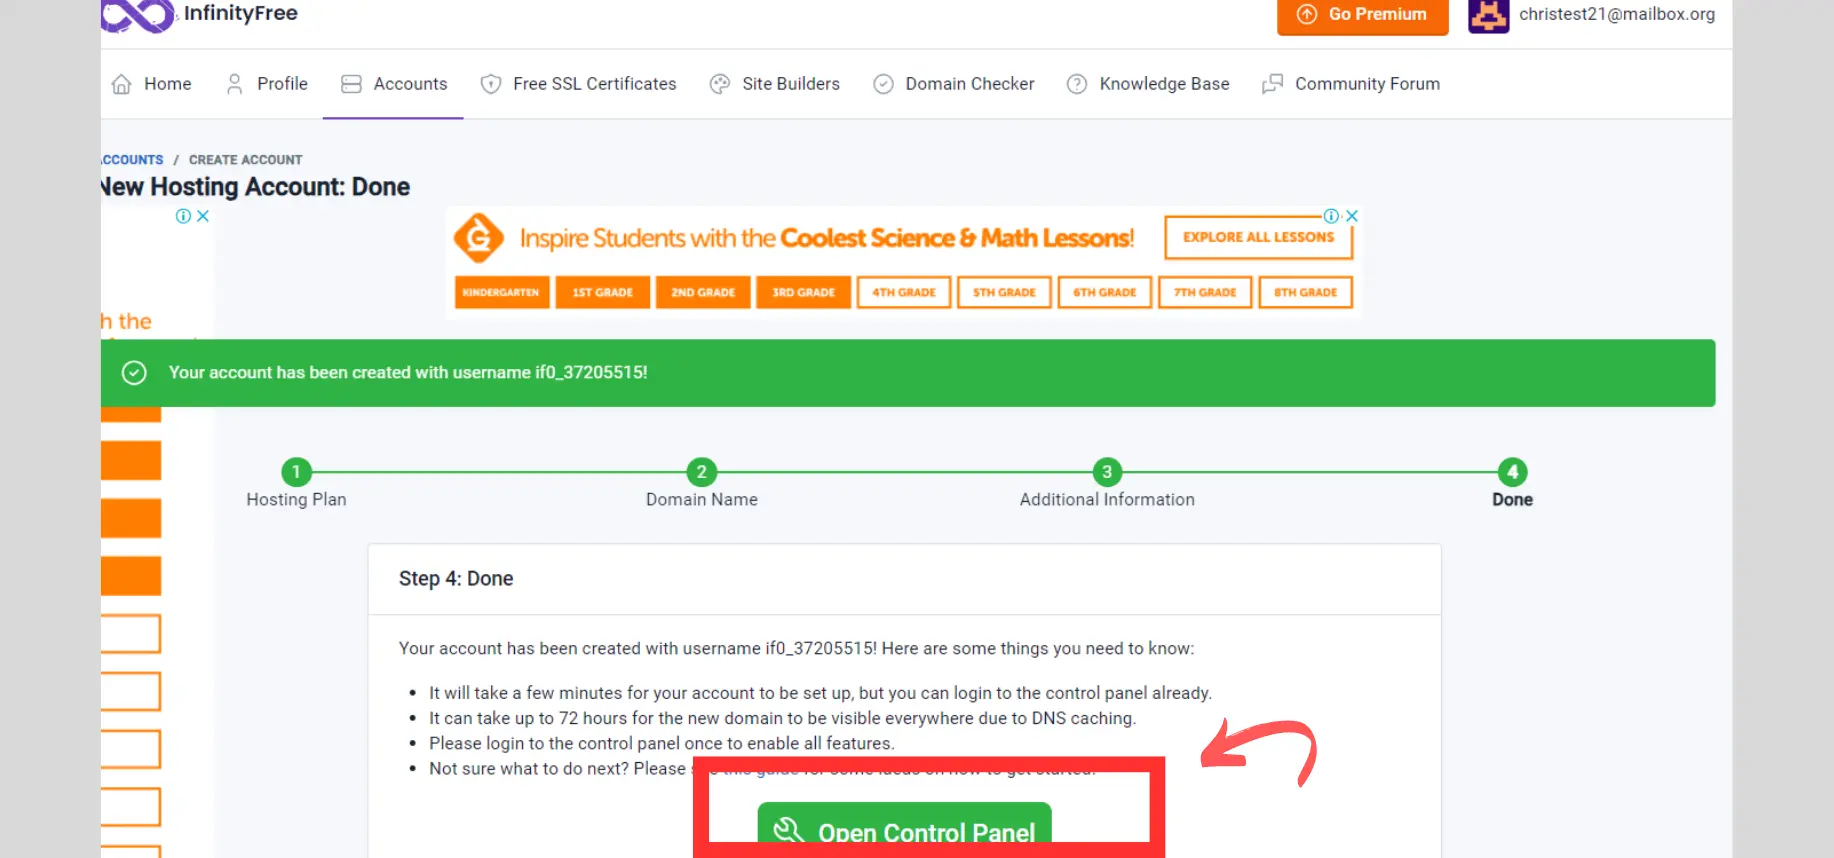
- Login to Control Panel: Use your provided credentials to log into the cPanel where you can start managing your website.
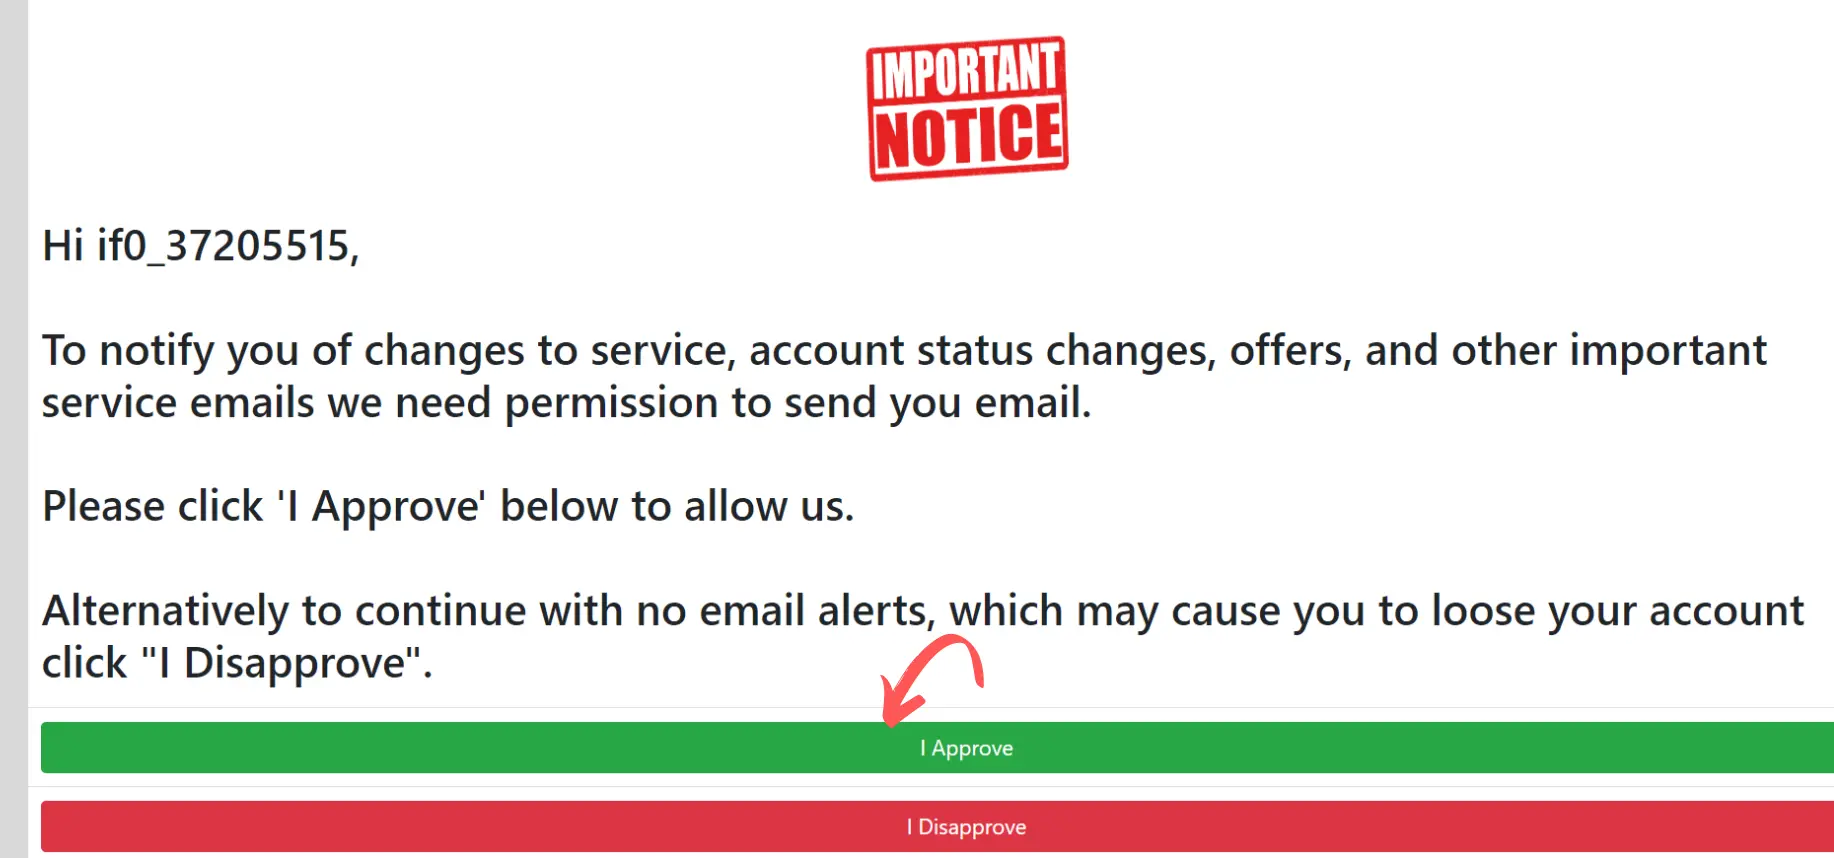
- On the importance Notice page, click the ‘I Approve’ button.
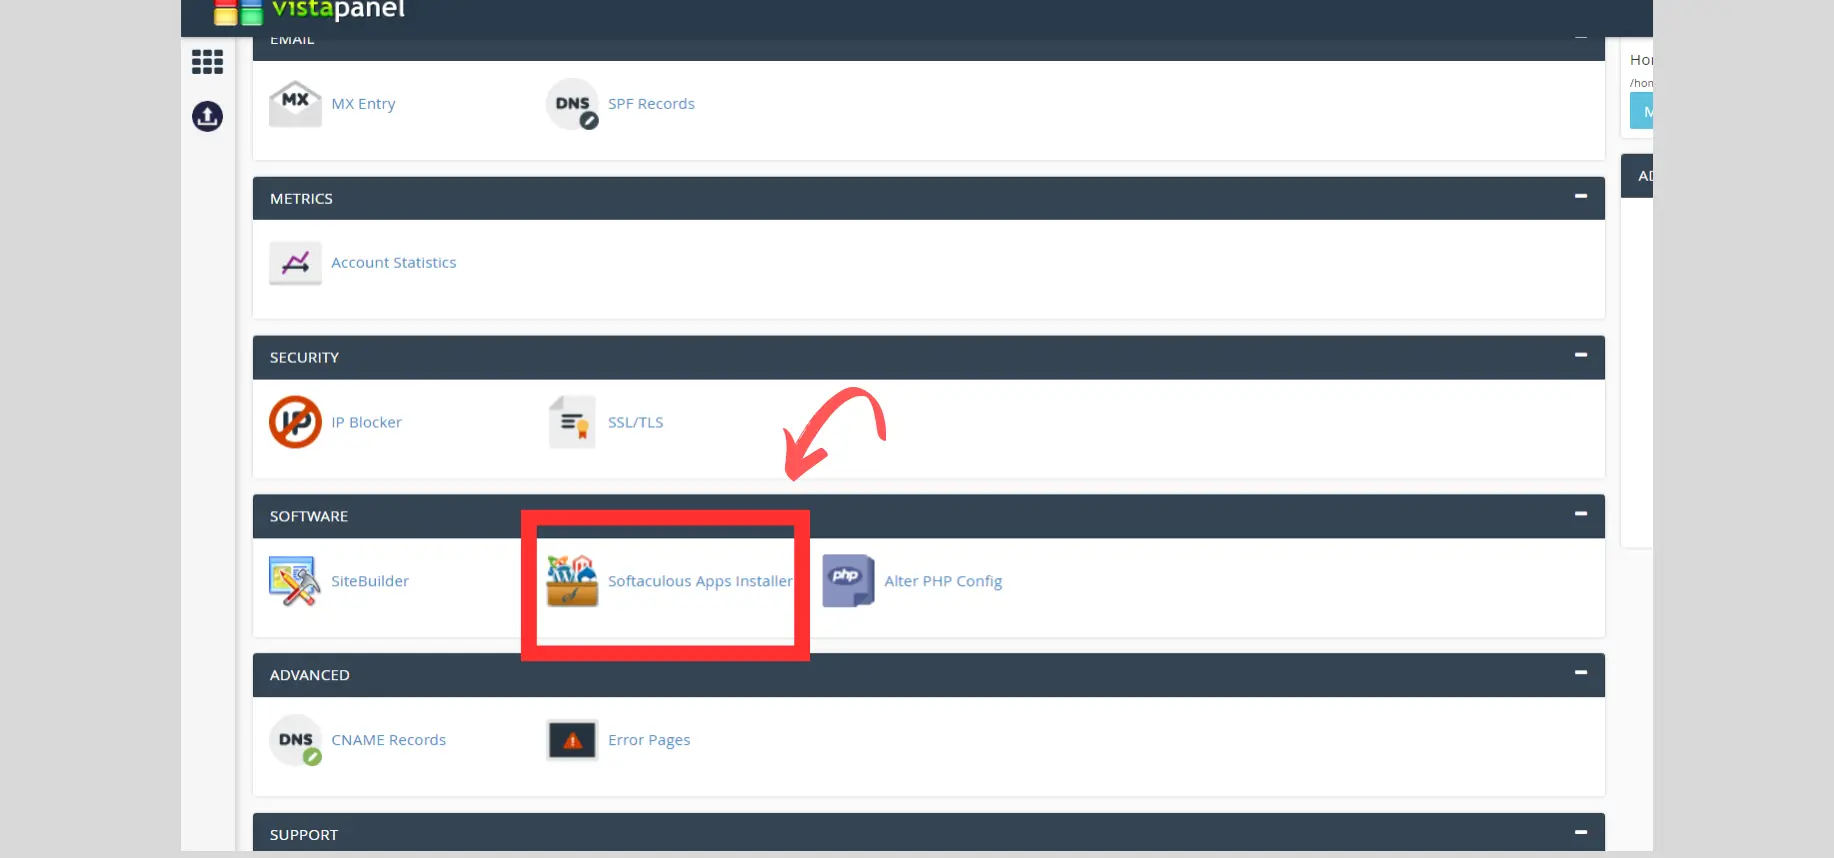
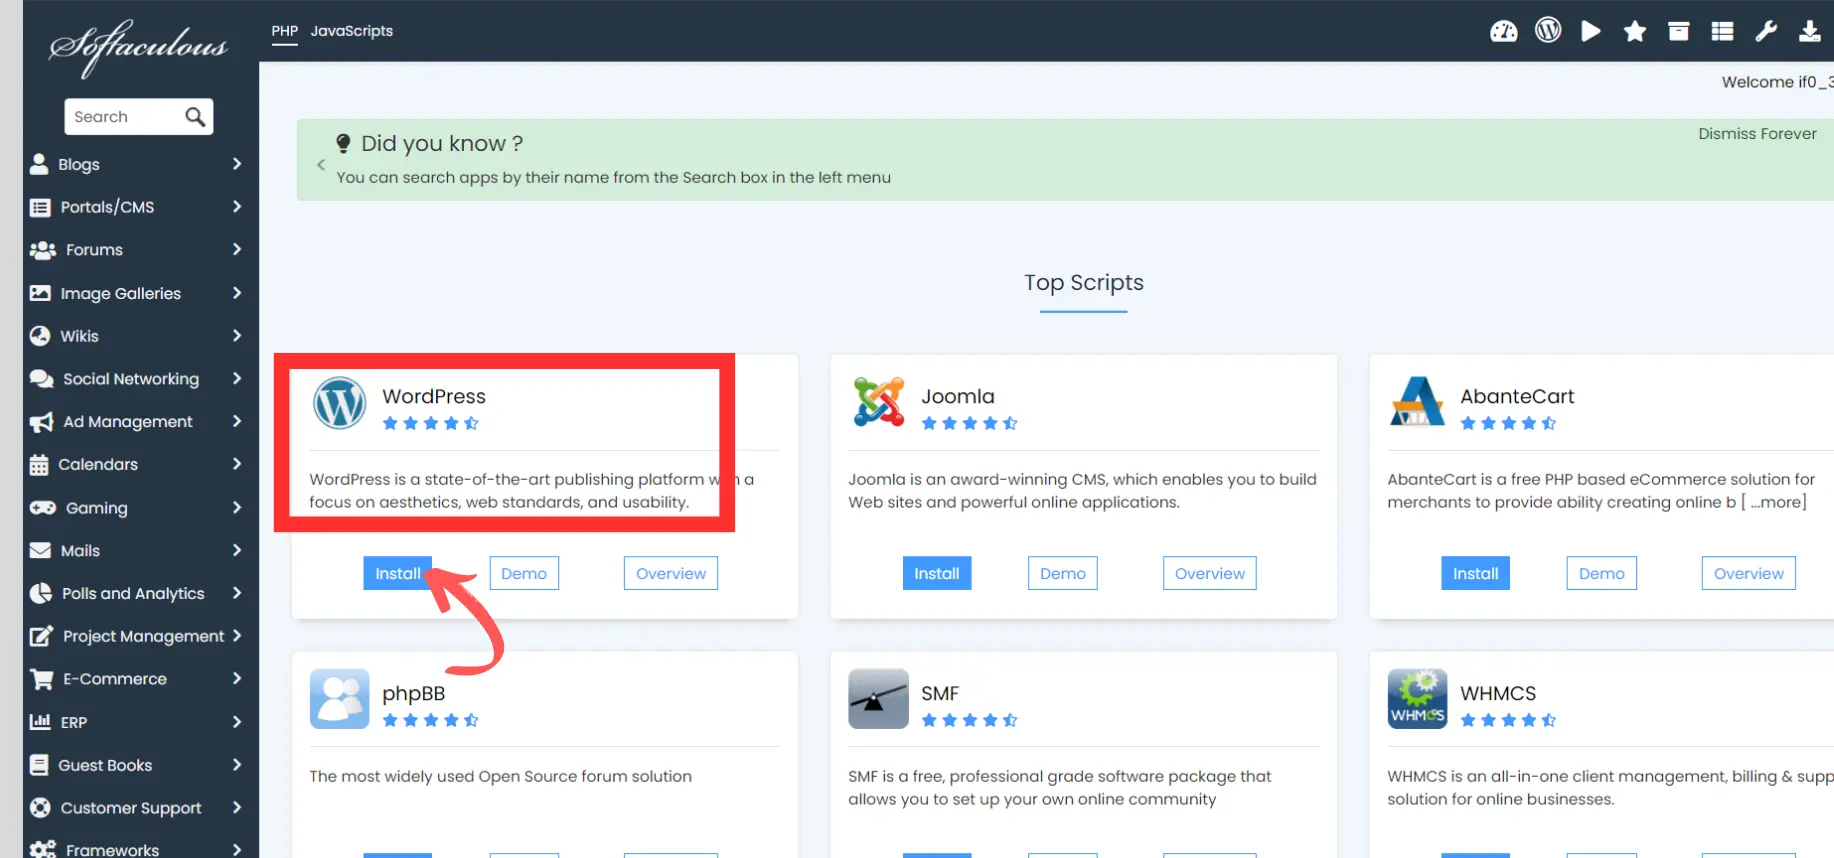
Find Softaculous App Installer: In the control panel, scroll down until you find the “Softaculous Apps Installer” section. Click on it.
- Select WordPress: In Softaculous, you’ll see a variety of applications you can install. Find and click on “WordPress.”
- Click on “Install Now”: On the WordPress installation page, click the “Install” button.
6: Configure WordPress Installation
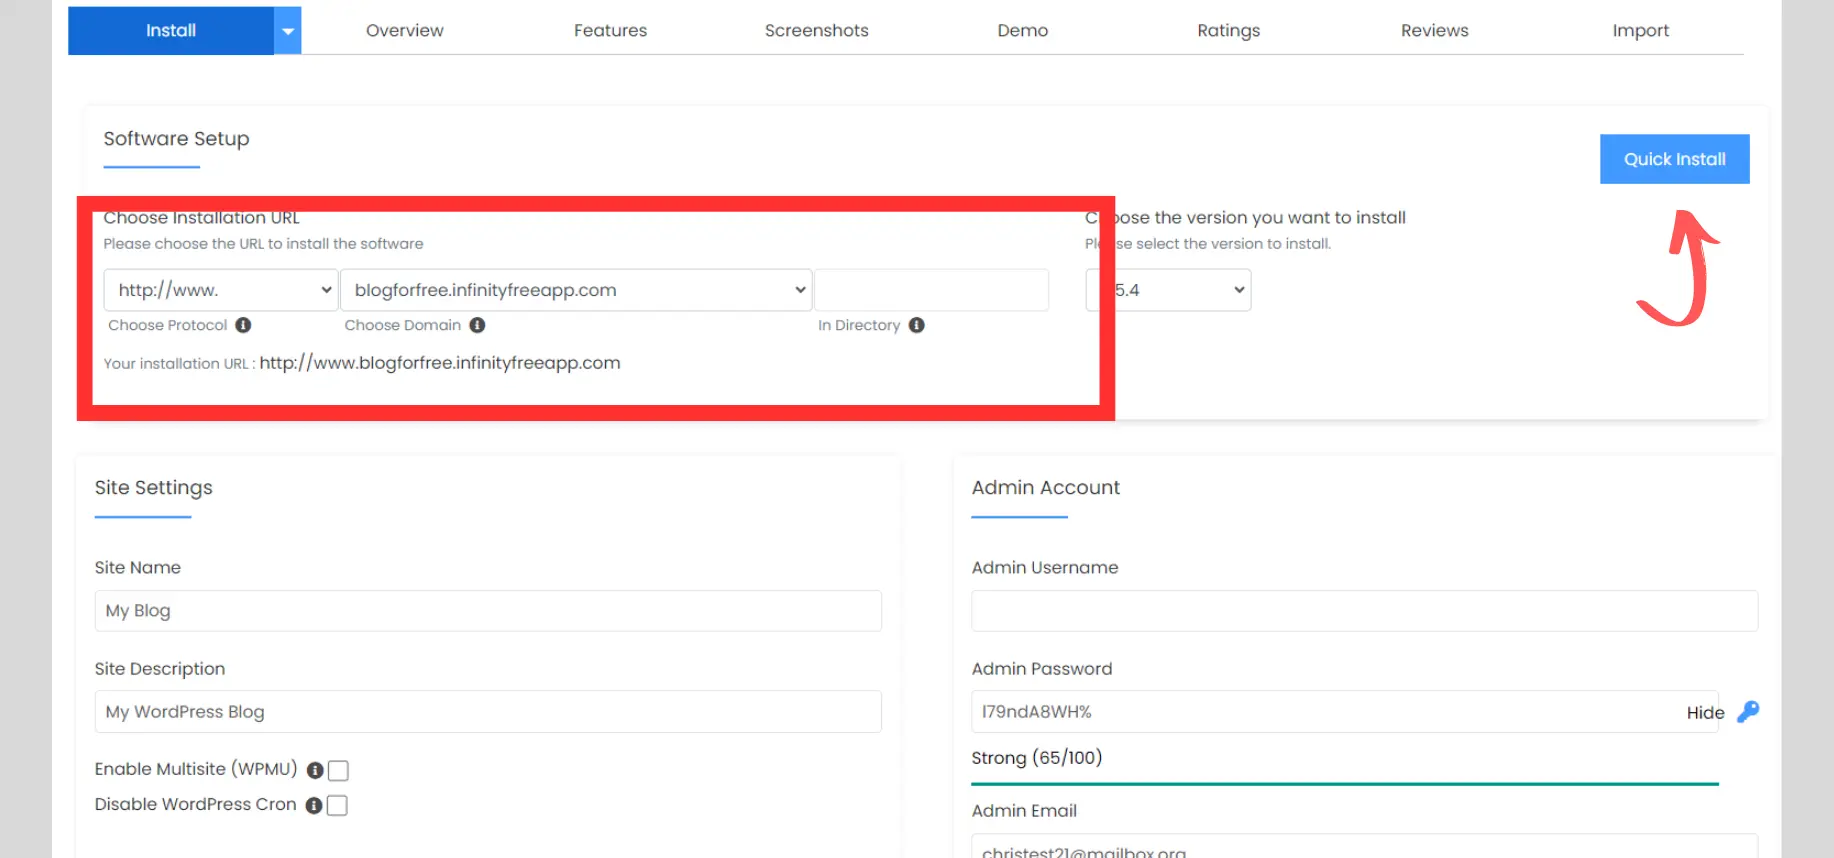
- Choose Installation URL: Select the domain or subdomain where you want to install WordPress. Usually, this is your main domain.
- Set Up Site Name and Description: Enter your blog’s name and a brief description.
- Create Admin Account: Choose a username, password, and email for your WordPress admin account. This will be how you log into your WordPress dashboard.
- Click “Quick Install”: Once you’ve configured everything, click “Quick Install” to begin the WordPress installation.
7: Access Your New WordPress Blog
- Wait for Installation Completion: Softaculous will take a few moments to install WordPress on your selected domain.
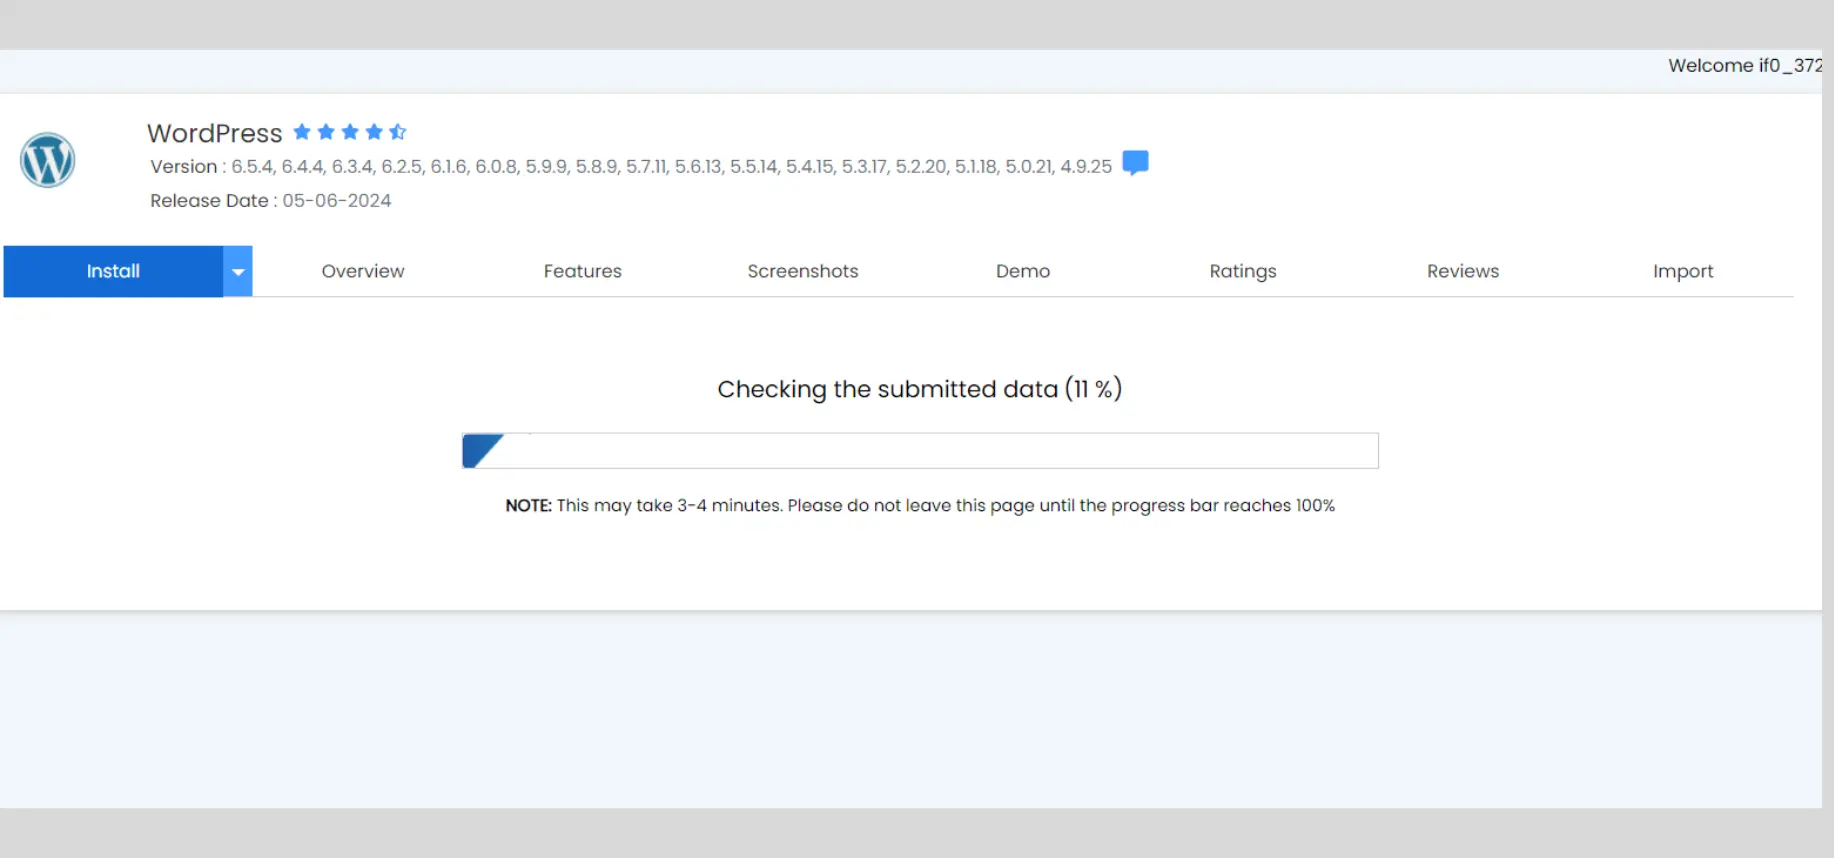
- Access WordPress Dashboard: After installation, you’ll receive a confirmation with a link to your WordPress admin area. Click on the link to log in.
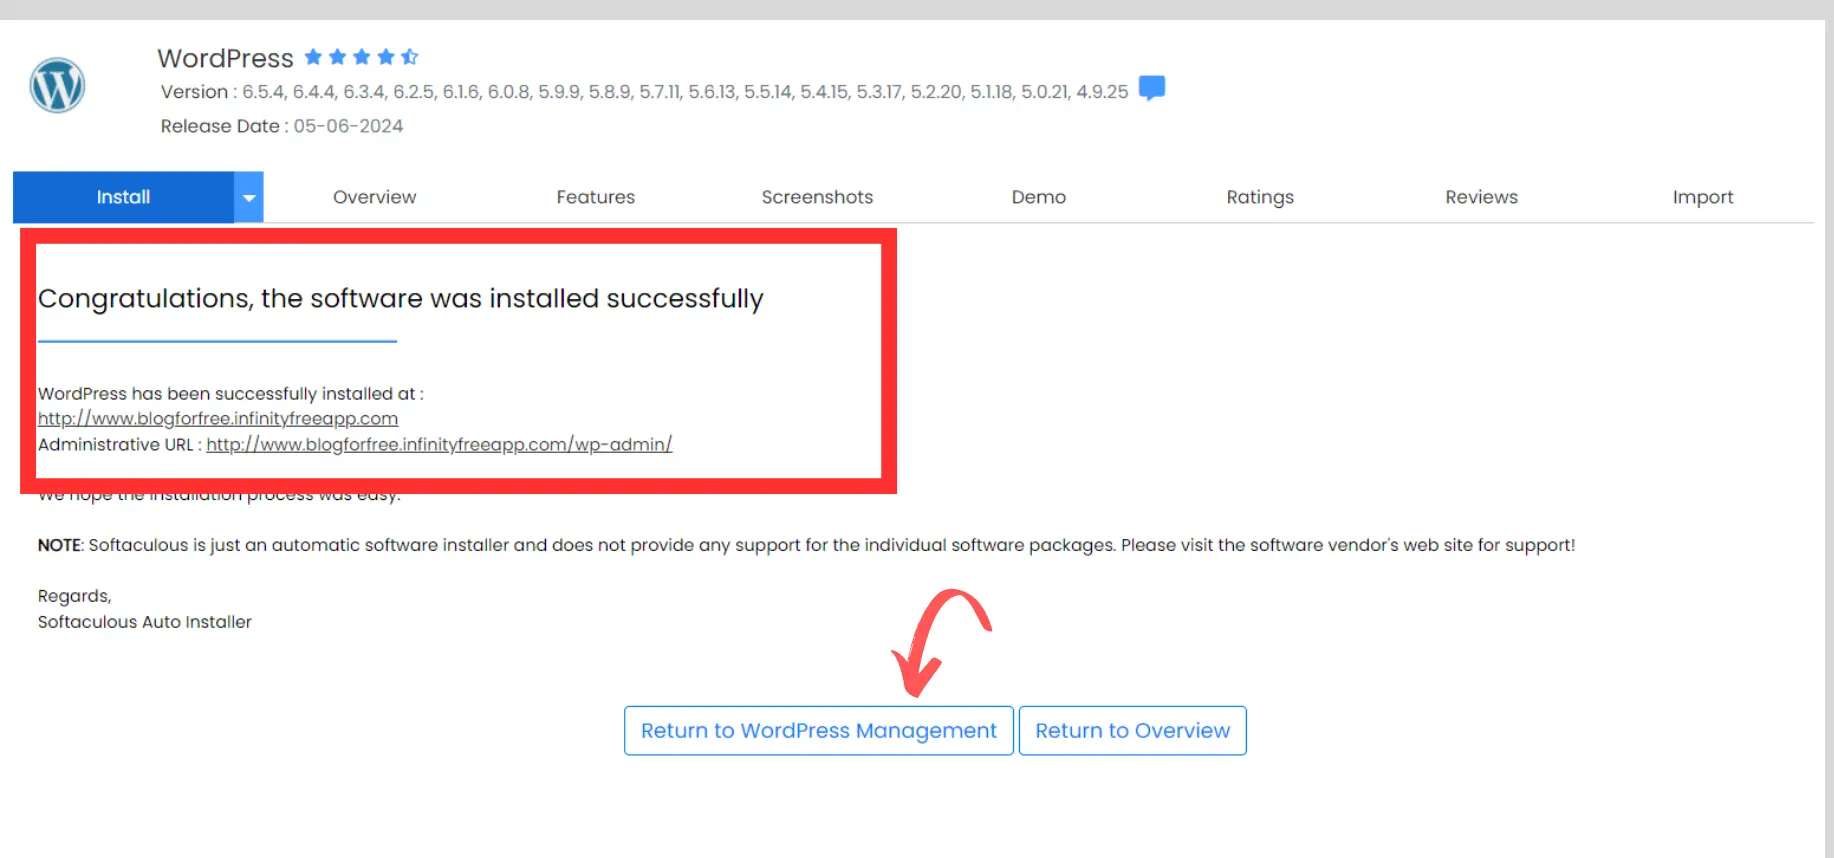
- Log in to WordPress: Use the admin username and password you created to log in to your WordPress dashboard.
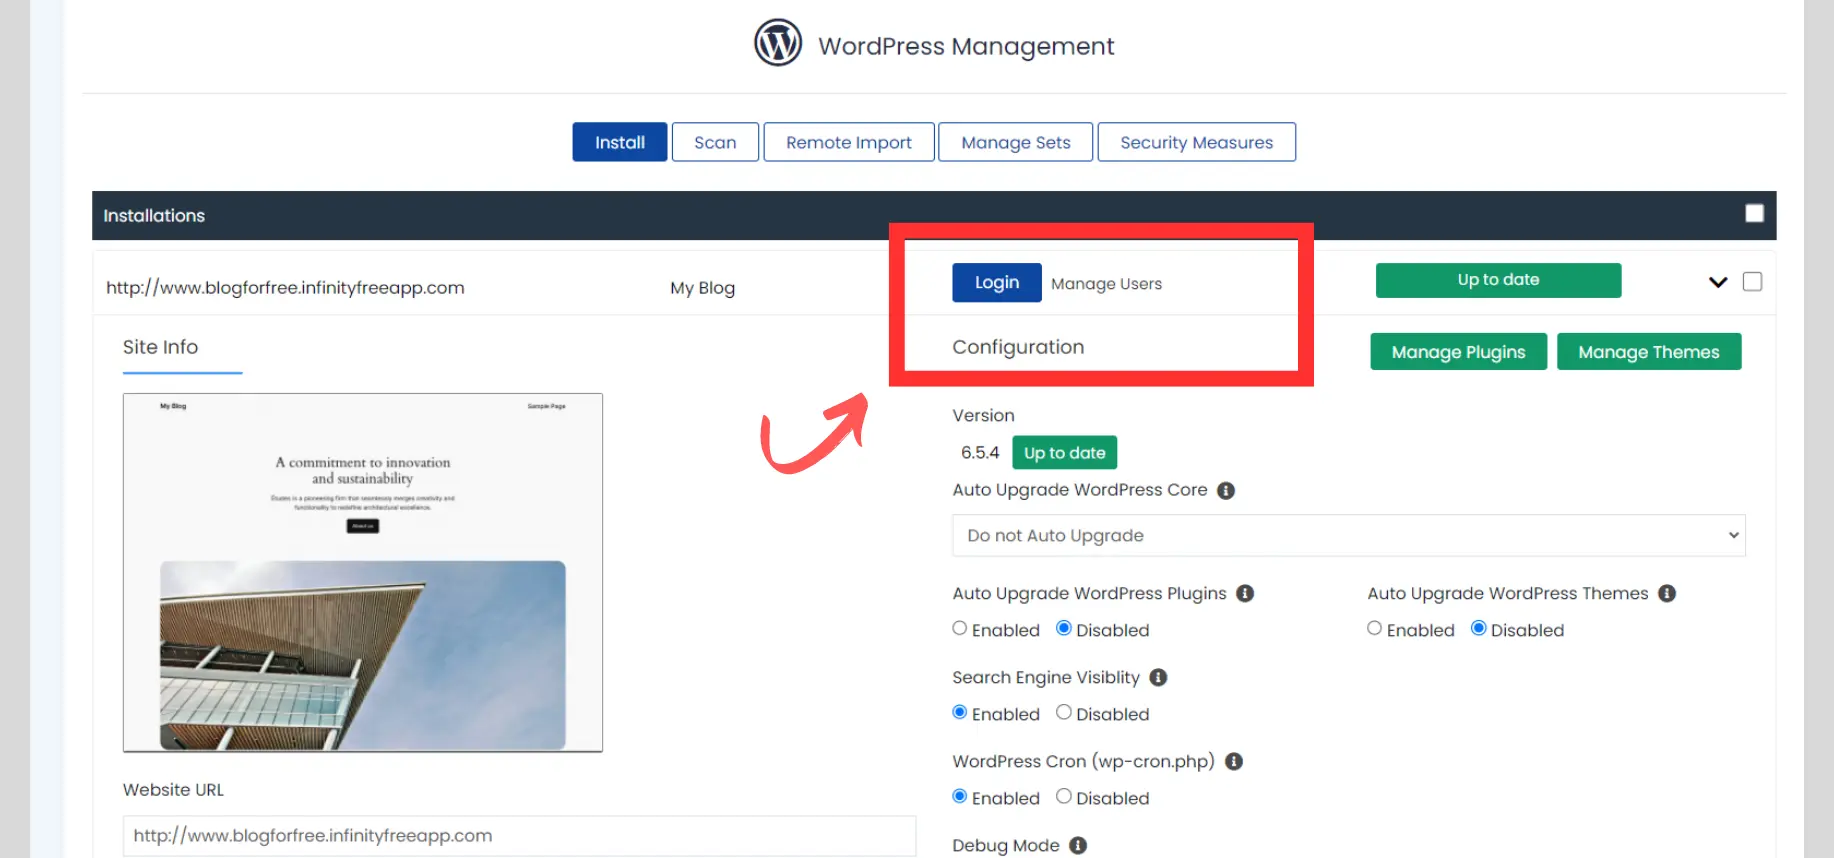
Important Note: Domain Propagation Time
After setting up your hosting account and installing WordPress, it may take up to 72 hours for your new domain name to propagate fully across the internet. Don’t panic if your website isn’t immediately accessible. This delay is normal and part of the DNS (Domain Name System) propagation process. During this time:
- Check DNS Settings: Ensure that your domain’s DNS settings are correctly configured.
- Clear Browser Cache: Sometimes, clearing your browser cache can help.
- Wait Patiently: Propagation times vary, but most domains update within 24-48 hours.
8: Confirm Your Site is Active
In our ‘free hosting for blog’ journey, patience is key with infinityFree. We have to come back and check that our host is now active.
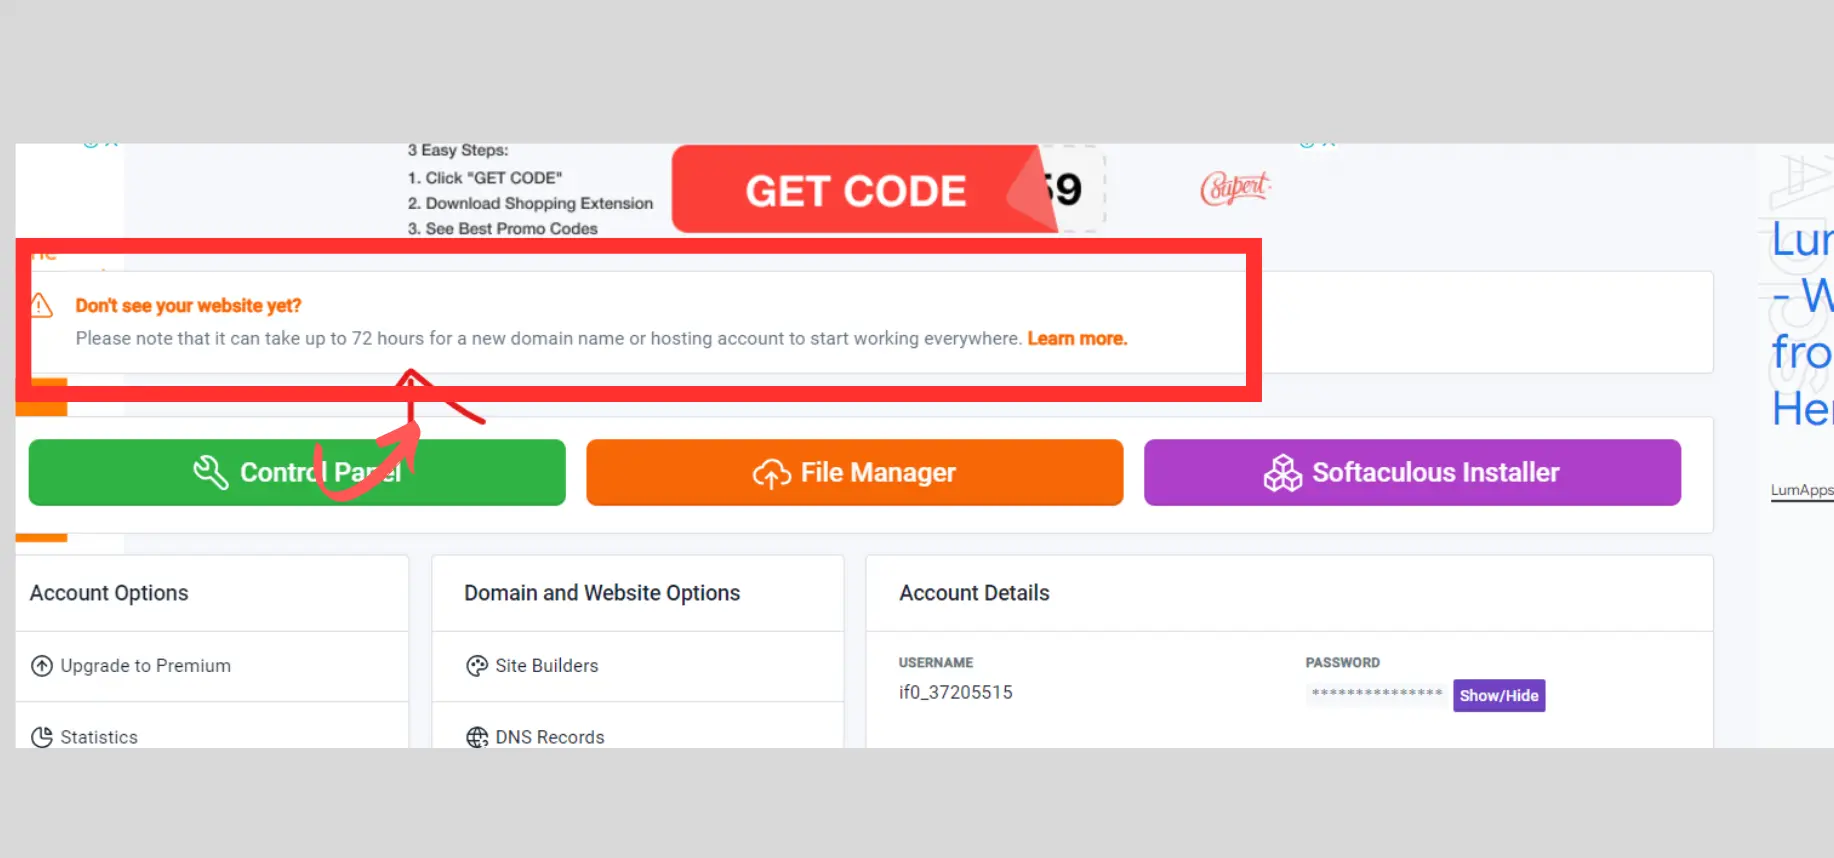
- Check Account Status: In your InfinityFree control panel, go to the Account Details section.
- Verify Status: Ensure that the status is showing as Active. This confirms that your site is now live.
- Click on Softaculous Installer: In the control panel, locate the Softaculous Installer button and click on it to access the app installation dashboard.
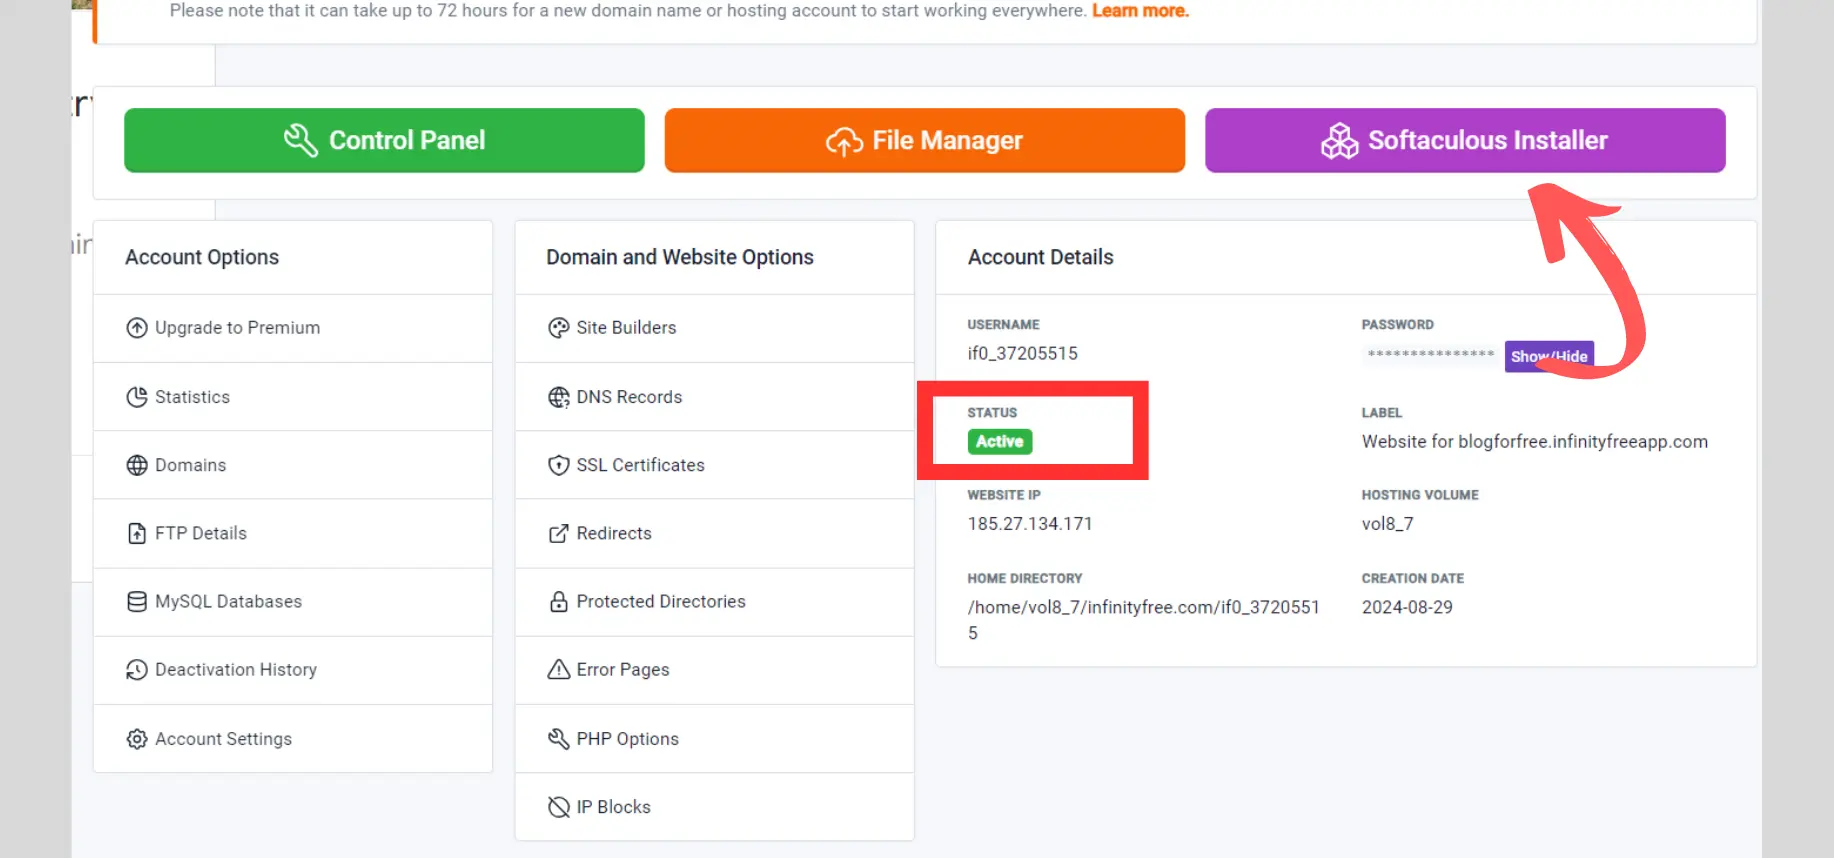
- Go to Installations: Within the Softaculous dashboard, click on Installations to see a list of the applications you’ve installed.
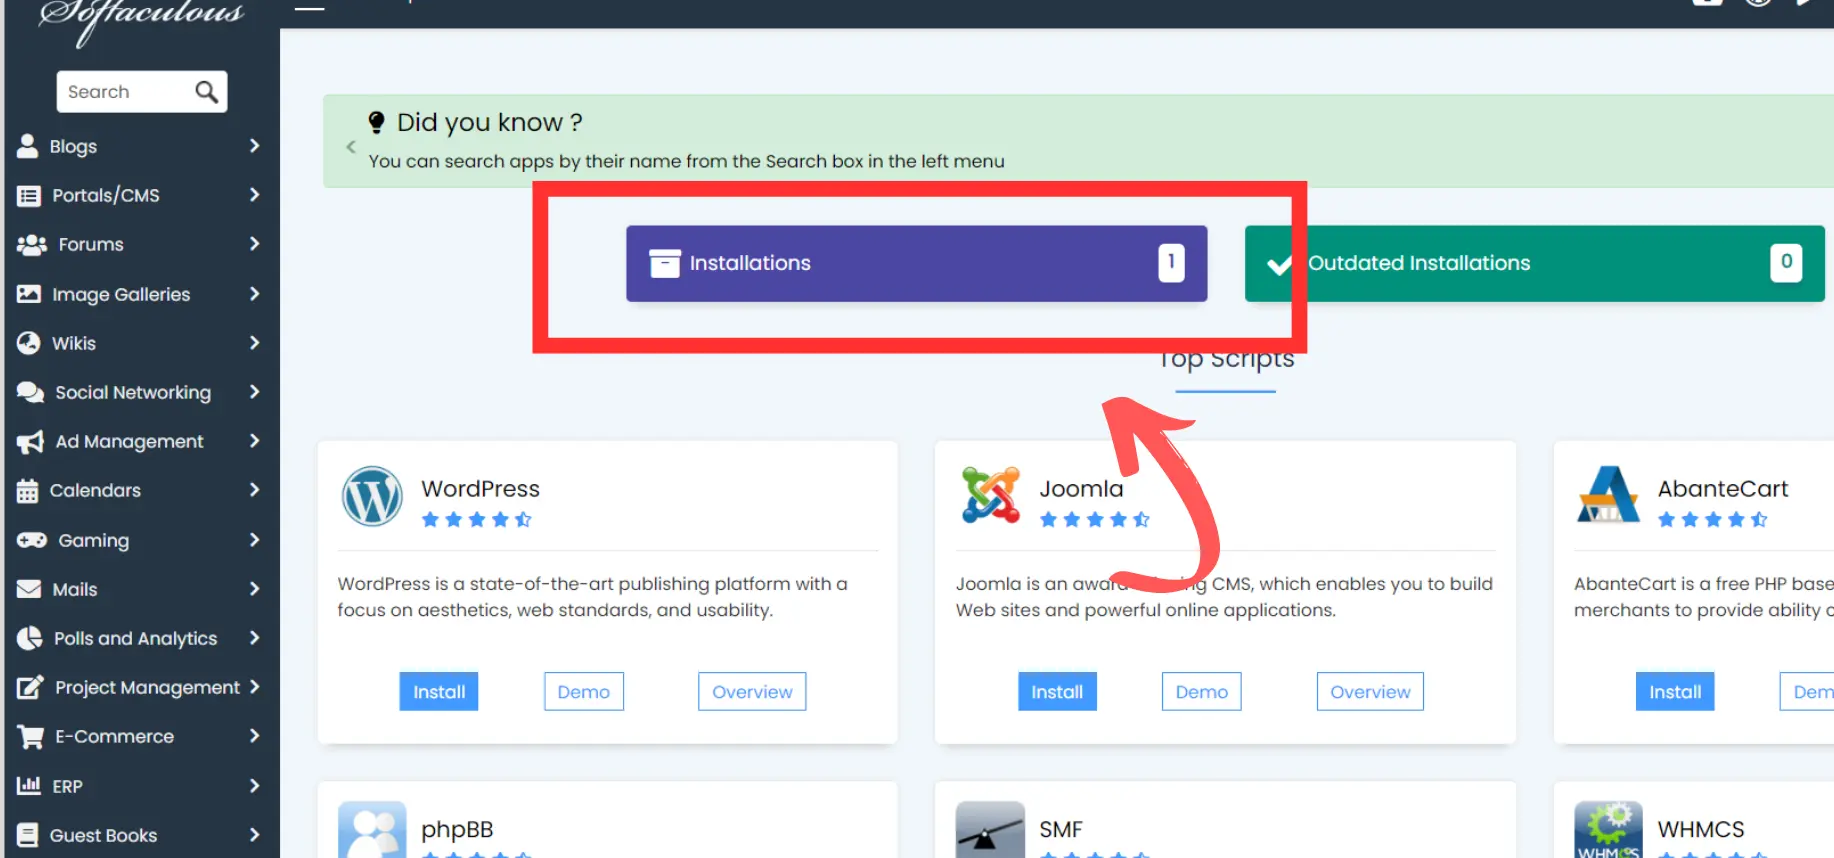
- Select WordPress: Find your WordPress installation and click on the WordPress icon.
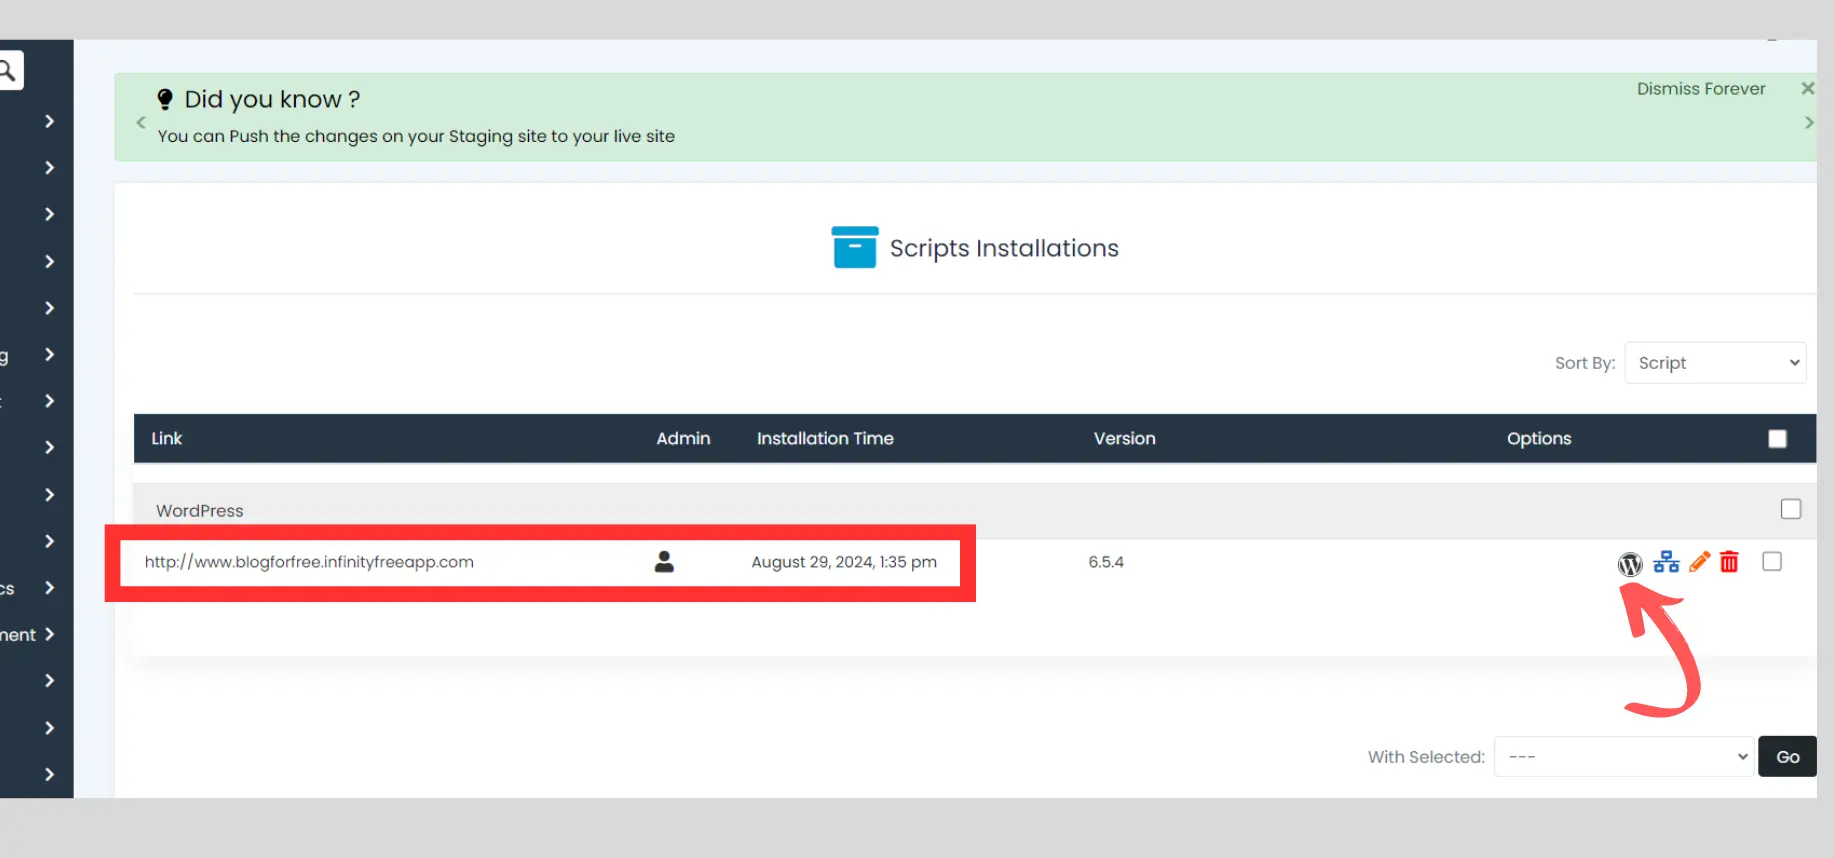
Click on Login: After clicking on the WordPress icon, you’ll be redirected to a page with your installation details. Click on the Login button to access your WordPress admin page.

Welcome to Your WordPress Admin Page: You’ve successfully logged in! Here, you can start customizing your blog, creating content, and managing your site.
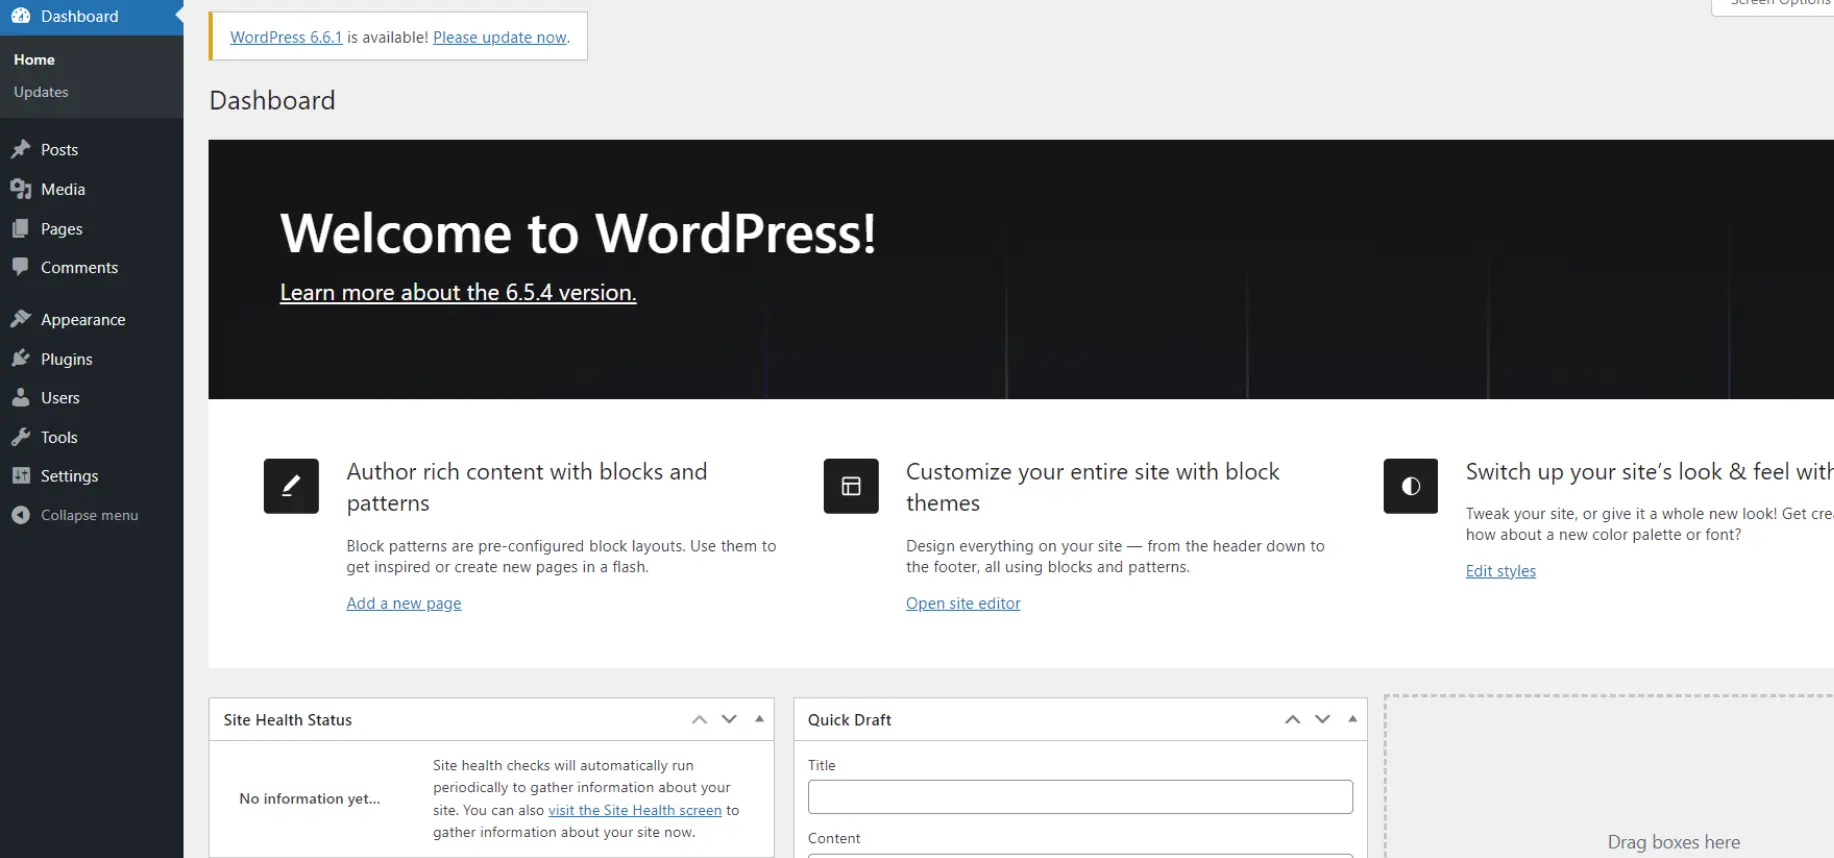
Learn to Navigate WordPress and Start Blogging
- Read the Resources: To learn how to navigate the WordPress admin dashboard, create posts, manage settings, and even monetize your blog, check out the resource guide on How to Start a Blog and Make Money: Ultimate Guide
Free Hosting for Blogs Concluding Thought
Starting a blog can feel overwhelming, but free hosting for blog makes it accessible for everyone. It’s perfect for beginners, hobbyists, or anyone just testing the waters. With free hosting, you can learn, grow, and share your voice without any cost.
If you’re ready to start your blogging journey, give free hosting a try! It’s a fantastic way to get started without financial worries. If you found this article helpful, share it with others or leave a comment below. Let’s get the conversation going!
Additional Resources;
- How to Start a Blog and Make Money: Ultimate Guide
- Blog Niche Ideas
- Best Blogging Platform To Make Money: Top 15 Choices
- 10 Common Amateur Blogger Mistakes and How to Avoid Them
FAQs
FAQ 1: Can you monetize a blog on free hosting?
Yes, but it can be challenging. Some free hosts limit your ability to display ads or use affiliate links.
FAQ 2: What are the best free hosting services for a blog?
Popular options include WordPress.com, Blogger, and Wix. Each has its strengths and limitations.
FAQ 3: Is free hosting safe for personal data?
Generally, yes, but it depends on the provider. Always check their privacy policy.
FAQ 4: How easy is it to switch from free to paid hosting?
Switching can be done, but it may involve some challenges like data migration and downtime. Plan ahead to make the transition smoother.

