Starting a blog can be exciting and overwhelming, but with the right guidance, you’ll have your blog up and running in no time. This comprehensive guide on blogger setup will walk you through each step, ensuring you’re well-equipped to start your blogging journey.
1. Why Choose Blogger for Your Blog?
Before going into the setup, it’s important to understand why Blogger is a great choice for beginners. It’s free, user-friendly, and backed by Google. Plus, it offers seamless integration with other Google services like AdSense and Analytics.
Benefits of Blogger:
- Free Platform: No hosting fees.
- User-Friendly Interface: Perfect for beginners.
- Customization Options: Simple yet effective design tools.
2. Blogger Setup – Blogger Account
Setting up your Blogger account is the first and simplest step in your blogger setup journey. All you need is a Google account, and you’re halfway there!
Before You Start, you will need a Google (Gmail) Account.
Step 1: Sign In with Google
- Visit Blogger.
- Sign in using your Google account. If you don’t have one, create it first.
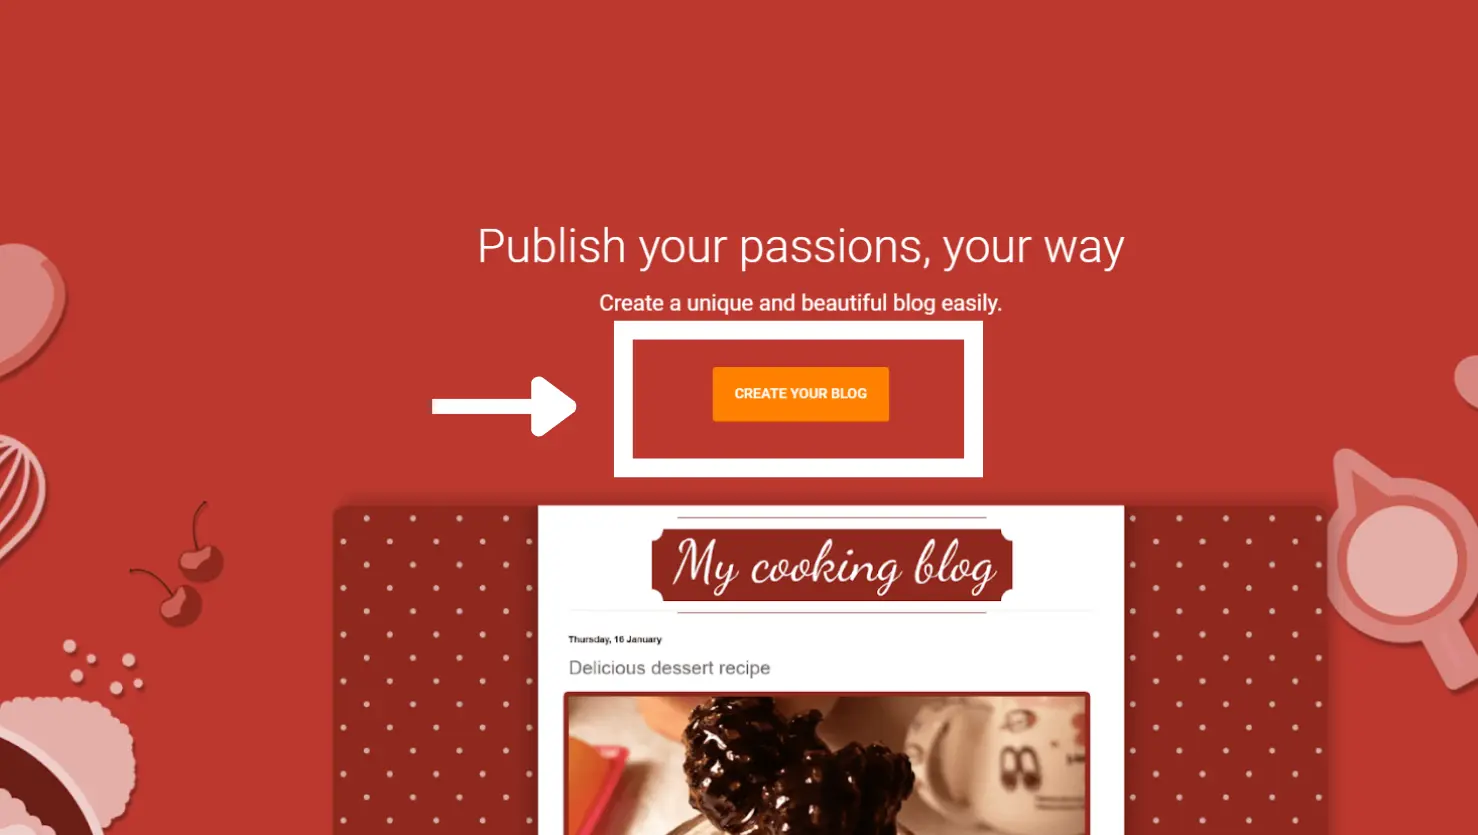
Step 2: Create a New Blog
- Click on “Create New Blog”.
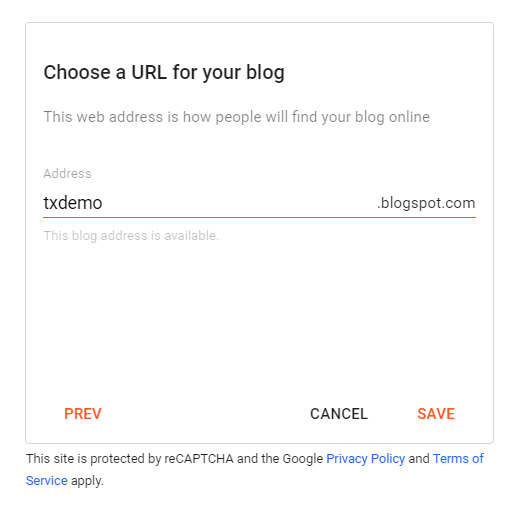
- A window will pop up asking for your blog’s title, address (URL), and theme.
Your blog address should be easy to remember and related to your niche. Once you’re satisfied, click “Create Blog!”
- Provide your Gmail login details.

- Enter a unique title and domain name for your blog and you’re done.
3. Blogger Setup – Choosing the Perfect Blog Name
Choosing a name for your blog is one of the most critical aspects of your blogger setup. The name should reflect your brand, niche, and target audience.
Tips for Choosing a Blog Name:
- Keep It Simple: Simple names are easy to remember.
- Be Specific: Reflect your niche or the content you plan to create.
- Check Availability: Ensure the name is available both as a URL and on social media platforms.
Remember, your blog name is visitors’ first impression, so make it count.
4. Customizing Your Blog Design
Customization is where you make your blog uniquely yours. Blogger offers several templates, but the real fun begins when you start tweaking them to match your style.
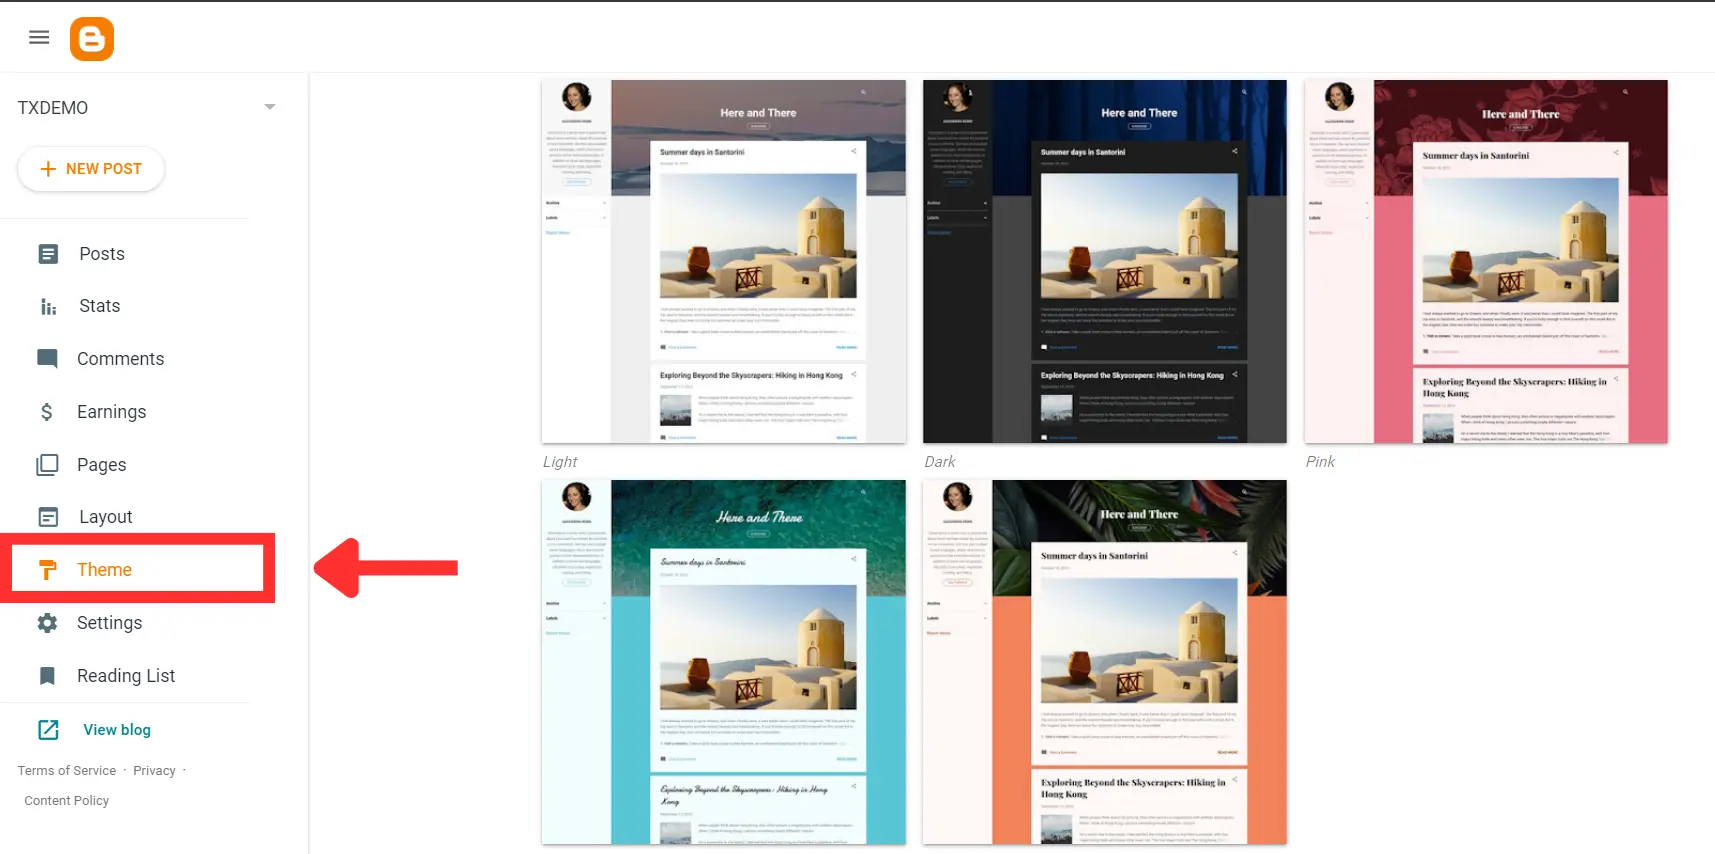
Step 1: Choose a Theme
- Navigate to the “Theme” section.
- Browse through the available themes and select one that resonates with your brand.
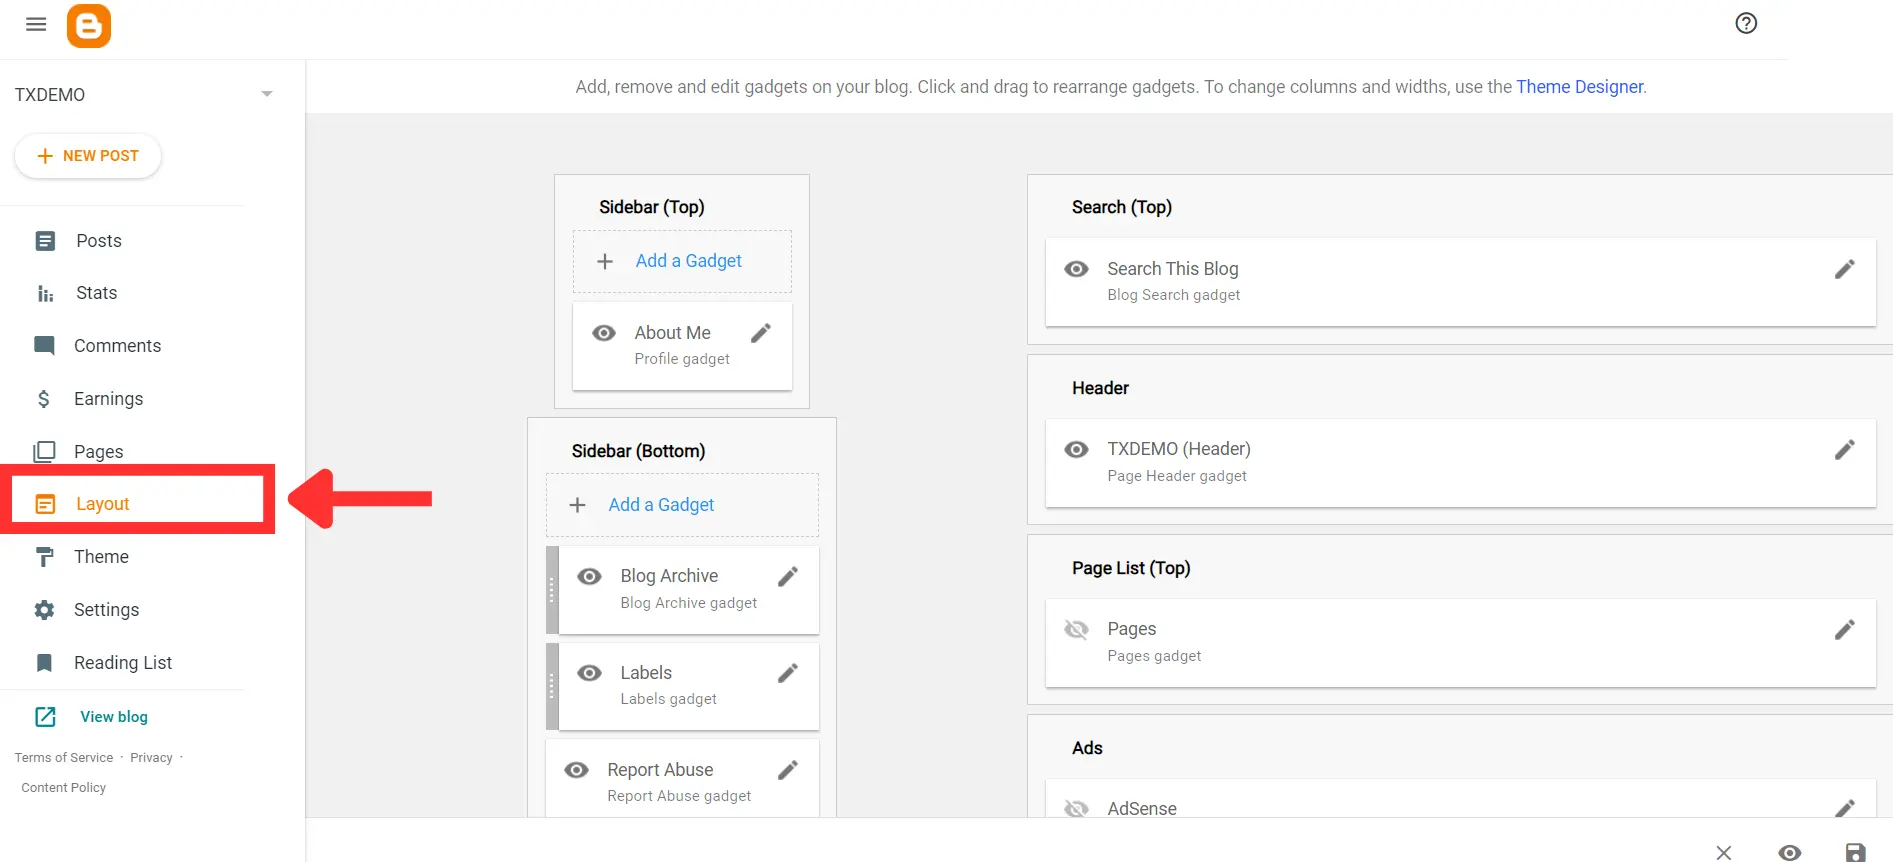
2: Customize Your Layout
- Go to “Layout” and start customizing.
- Add or remove gadgets like the header, sidebar, and footer to suit your needs.
3: Set Up Your Favicon
- A favicon is a small icon that represents your blog in the browser tab.
- To add one, go to “Layout” > “Favicon” and upload a 16×16 pixel image.
5. Writing and Publishing Your First Post
Now that your blog is set up, it’s time to write your first post. Writing is where your blogger setup truly comes to life.
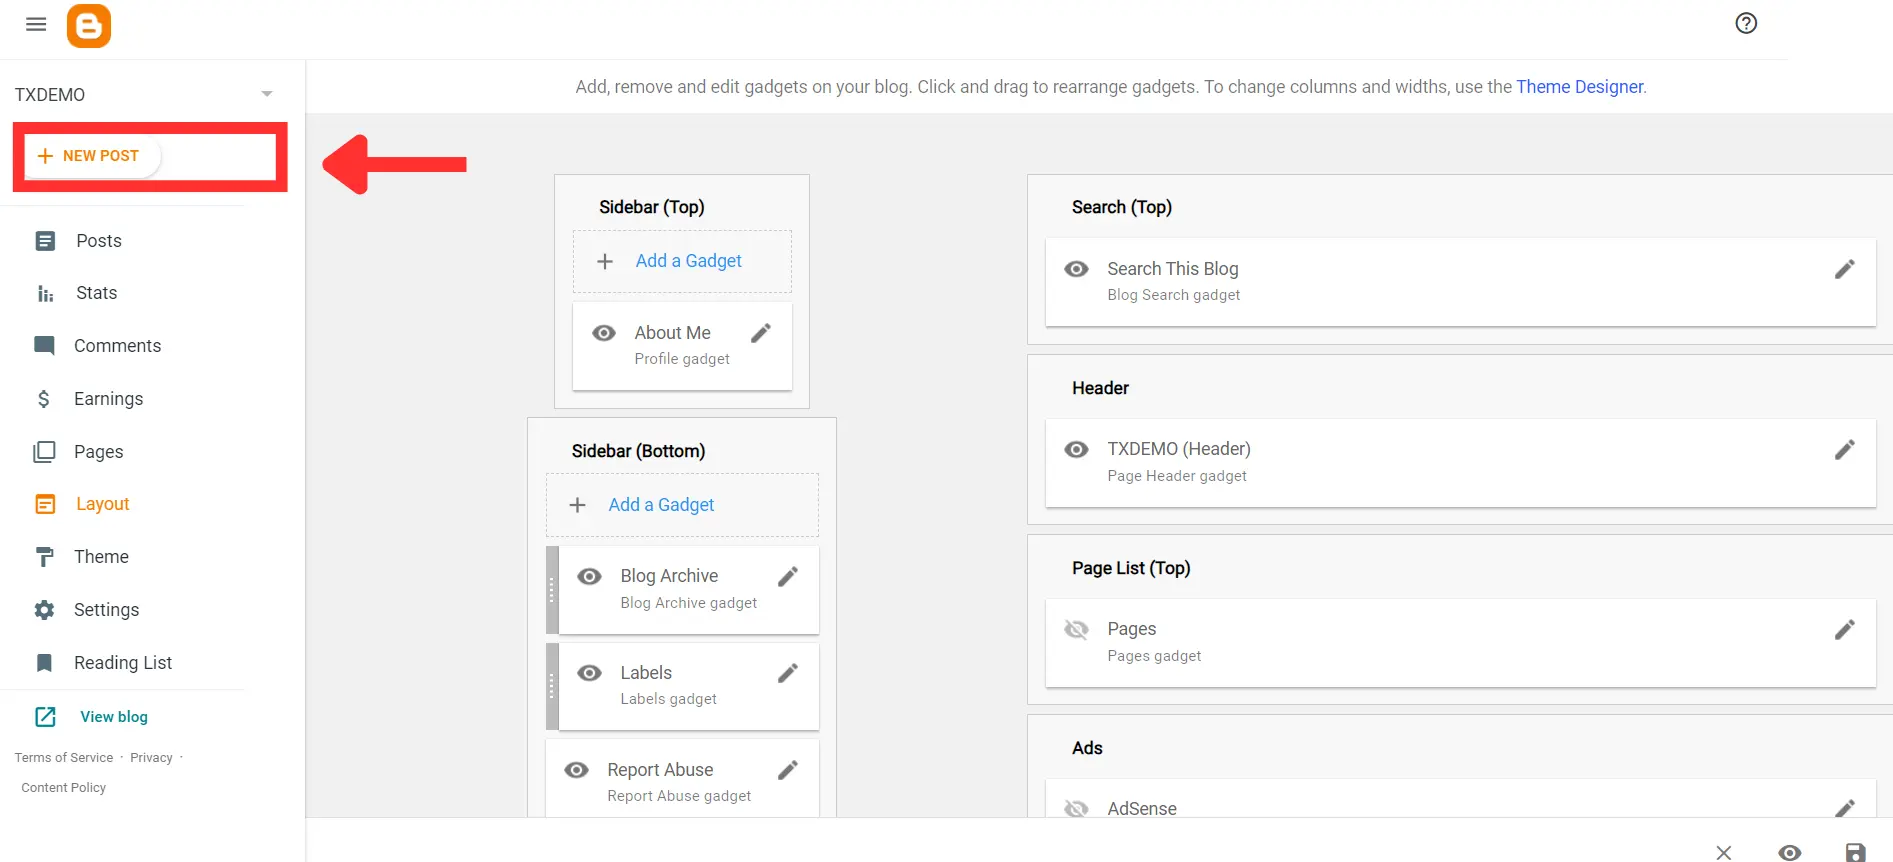
Step 1: Navigate to the Post Editor
- Click on “New Post” in the Blogger dashboard.
- You’ll be taken to the post editor, where you can start writing.
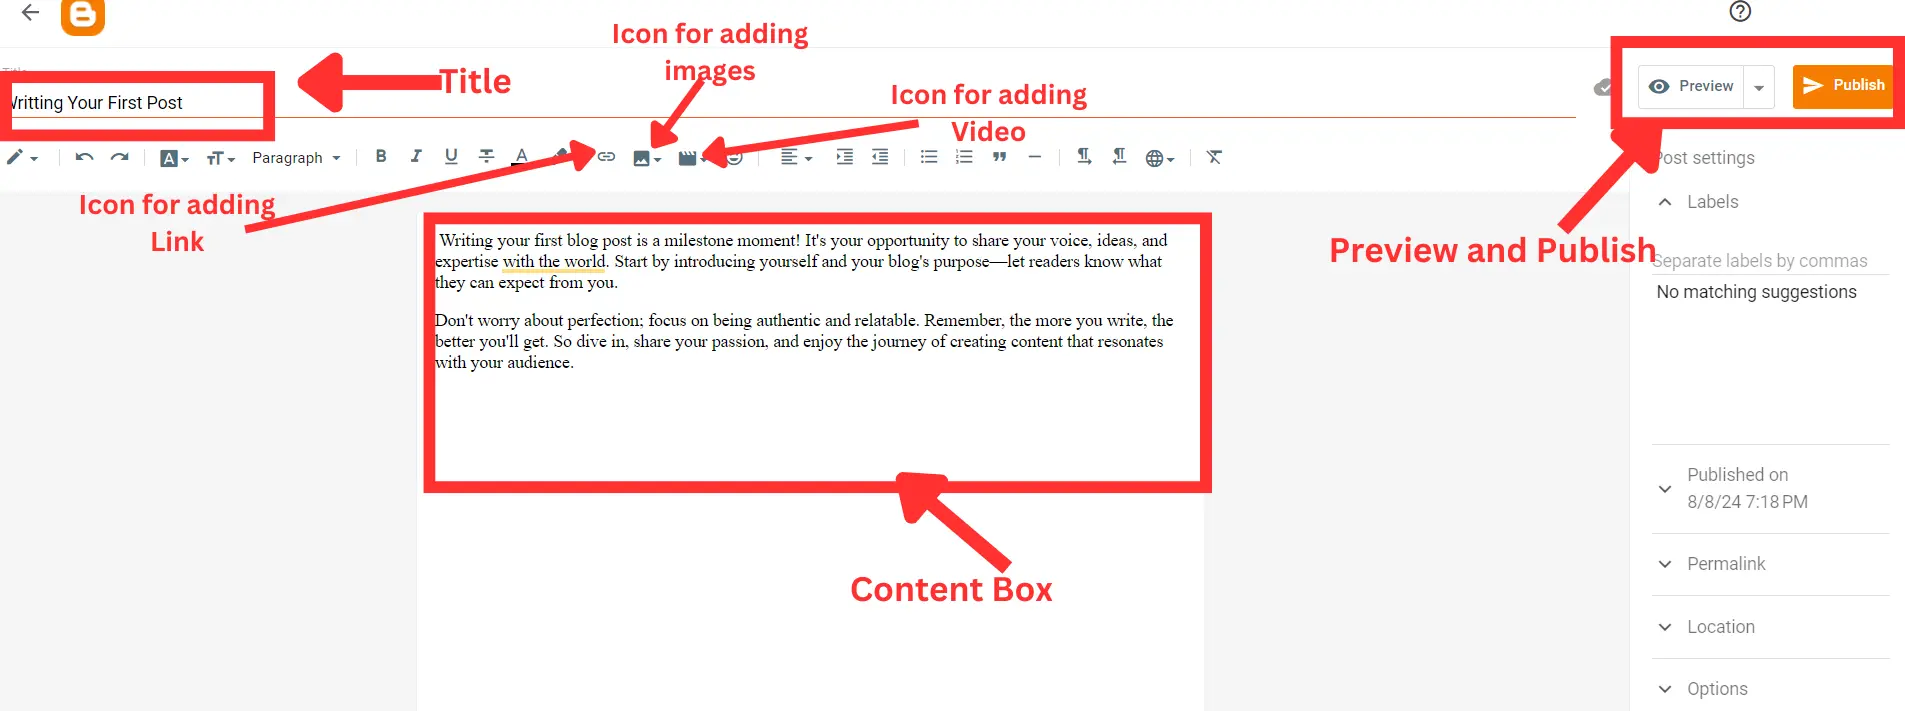
2: Crafting Your Content
- Write a catchy title.
- Create engaging content that resonates with your audience.
- Add images, videos, or other media to enhance your post.
3: Publish Your Post
- Once you’re satisfied, hit “Publish”.
- Your post is now live and ready for readers!
6. Enhancing Your Blog with Essential Gadgets
Gadgets are the extra features that make your blog functional and engaging. During your blogger setup, you’ll want to add some essential gadgets to improve your readers’ experience.
Popular Gadgets to Add:
- Search Bar: Helps visitors find content quickly.
- About Me: Introduces you to your readers.
- Popular Posts: Showcases your top-performing content.
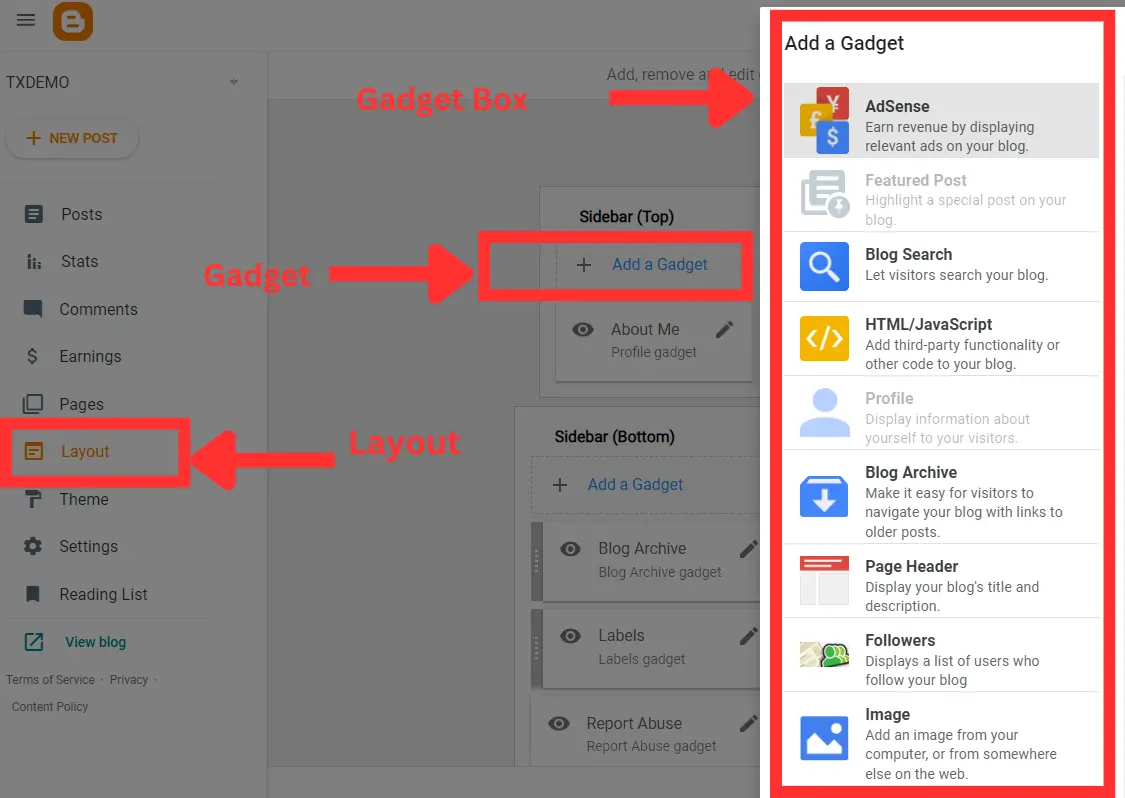
Adding gadgets is easy; simply go to “Layout”, click “Add a Gadget”, and select the ones you want.
7. Blogger Setup – Monetizing Your Blog
One of the most exciting aspects of blogging is the potential to earn money. With your blogger setup complete, you can start exploring monetization options.
Monetization Methods:
- Google AdSense: Display ads on your blog and earn from clicks.
- Affiliate Marketing: Promote products and earn commissions.
- Sponsored Posts: Partner with brands to write posts for a fee.
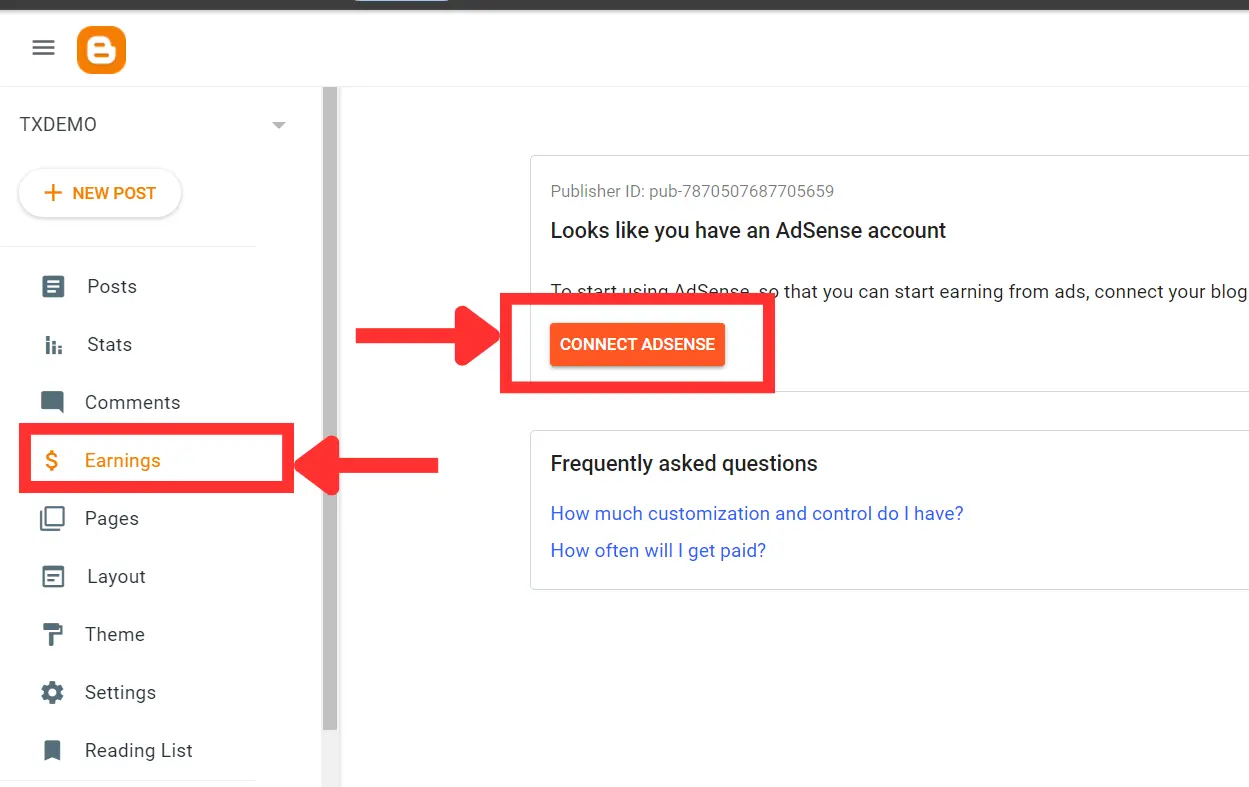
Integrating AdSense is straightforward; just navigate to the “Earnings” tab in your dashboard and follow the prompts.
8. Promoting Your Blog
Finally, promotion is key to growing your blog. Your blogger setup isn’t complete until you start driving traffic to your content.
Effective Promotion Strategies:
- Social Media Sharing: Share your posts on platforms like Facebook, Twitter, and Pinterest.
- SEO Optimization: Use keywords like to make your blog discoverable on search engines.
- Guest Posting: Write for other blogs in your niche to reach a wider audience.
Blogger Setup – Conclusion
Setting up a blog on Blogger is a simple yet rewarding process. With this guide, you’ve learned how to complete your blogger setup from start to finish. Now it’s time to put your knowledge into action and start creating amazing content!